

Creating Virtual Reality Units and Interactive Images Using Thinglink
by Susan Gaer
by Susan Gaer
Posted June 2019
You may have seen photos of users with high-tech virtual reality goggles tuned out to the world and wonder what type of experiences can be had. By definition, users are immersed in a 3D world and virtual reality places the user inside the experience as opposed to just viewing it. With Thinglink, you can easily recreate these experiences for students who will view them using simple cardboard VR devices. You can also use Thinglink as a non-immersive but engaging scavenger hunt of visual information. And finally, Thinglink can be used as a means for having students create these experiences for others. The power of student creation includes 21st century skills such as collaboration, research, and media literacy. So, what is Thinglink and how can you use it?
Getting a Free Account
First getting an account with Thinglink is free. To start using Thinglink, visit Thinglink.com ![]()
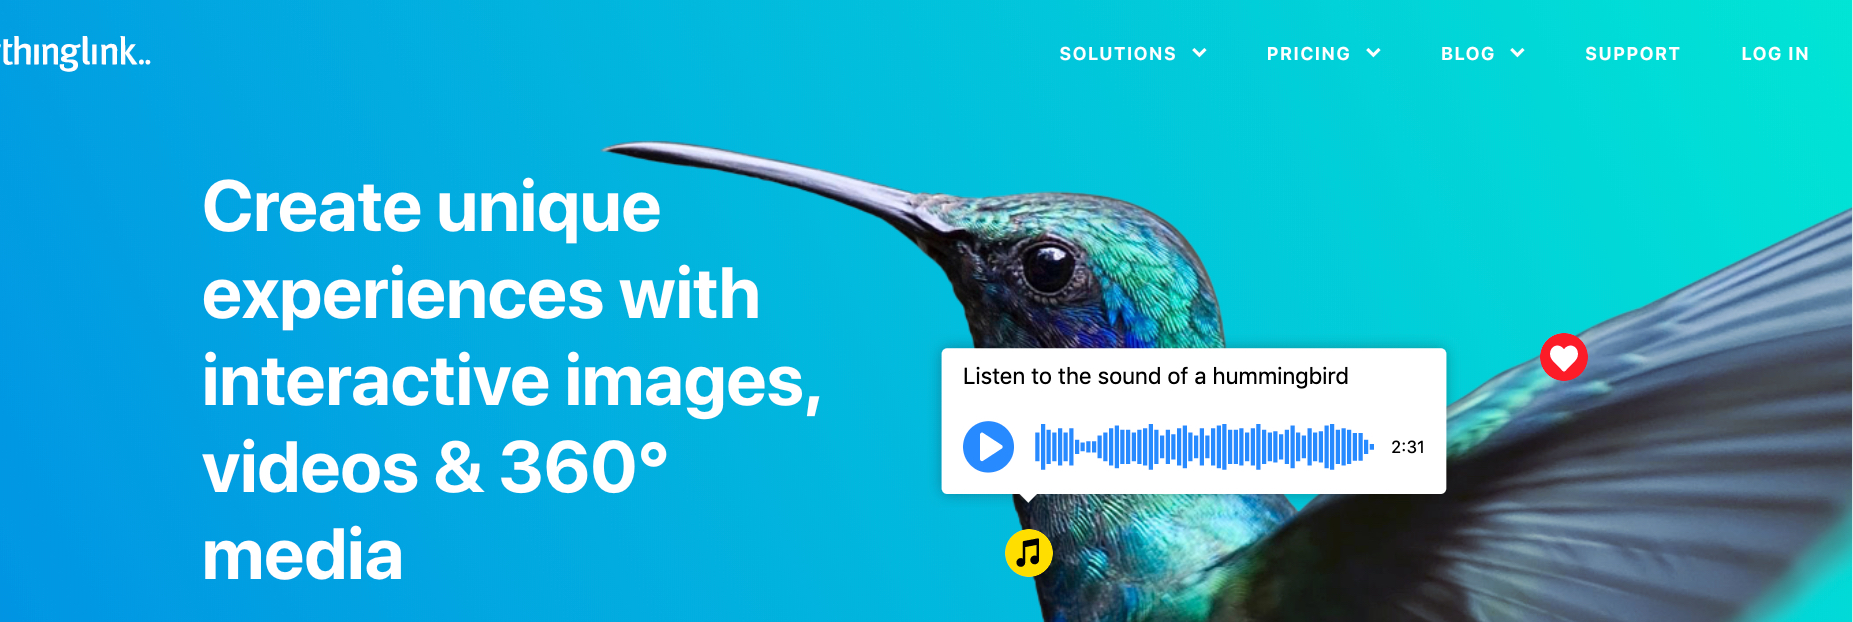
Fig 1
In Figure 1, you can see the first screen. This screen has an annotated image with music and other tags. To get started, just click the Start Now Screen as pictured in Figure 2.

Fig 2
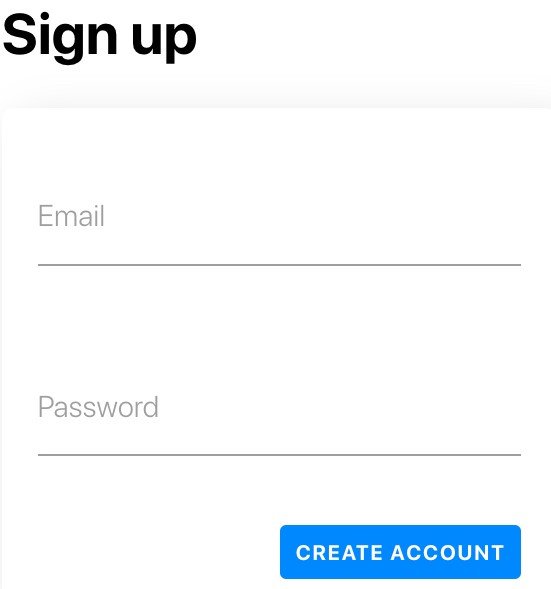
Fig 3
Simply type in an email and a password and click Create Account. (Figure 3) Next select Classroom Learning Account. Finally add your name and choose Teacher and then Get Started. (Fig 4)
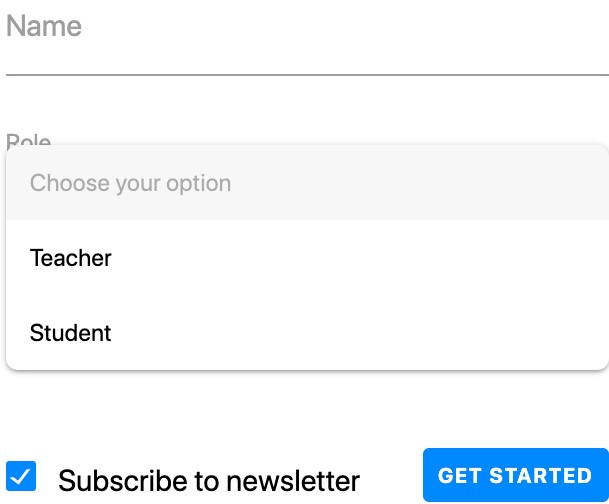
Fig 4
You will then be asked for information about your school and subject taught. This will start a video to walk you through the Thinglink Basics. There are lots of inspiring project ideas.
Starting Your First Project
Click the Create button to start your first project. (fig 5)
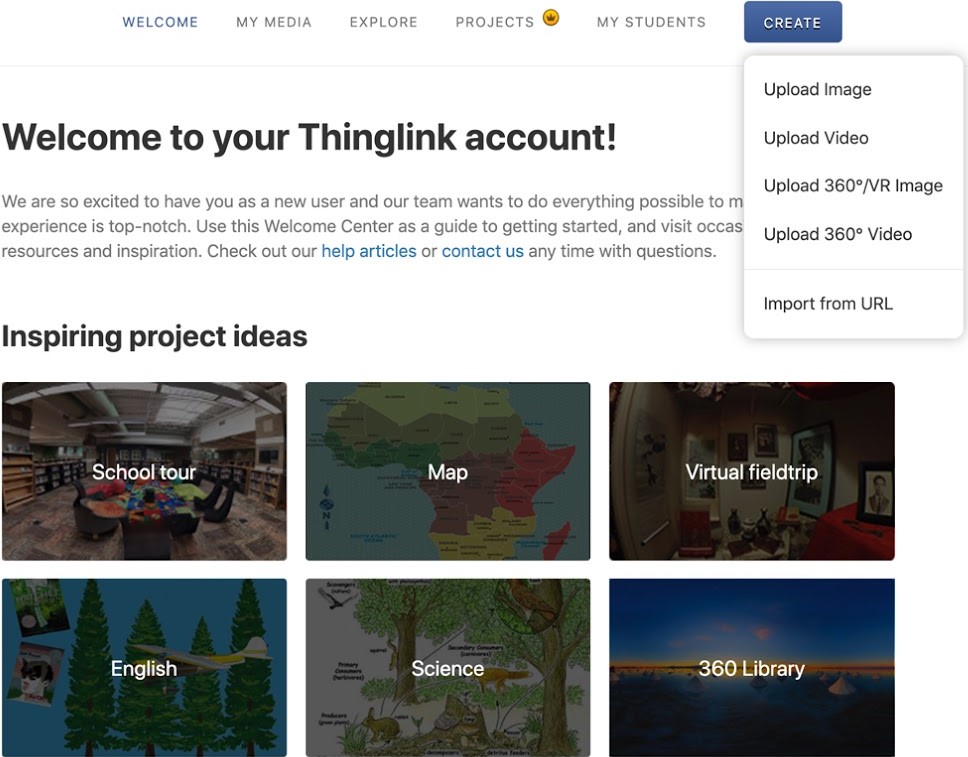
Fig 5
You will have 4 choices of how to upload your photo. You can upload an image, a video, a 360 photo (3D image), or a 360 video. For the purposes of this article, we will work with Images only. The basics will also work with 360 images. At the end of the article, I will show you where to get some free 360 images so you can create a virtual reality experience for your class.
Thinglink comes with three sample images that you can play around with. But for now, find an image on your computer that you want to work with. I chose a picture of my car to teach my students the parts of a car. Choose Create, Upload Image, and find the image you want to use. (Fig 6)
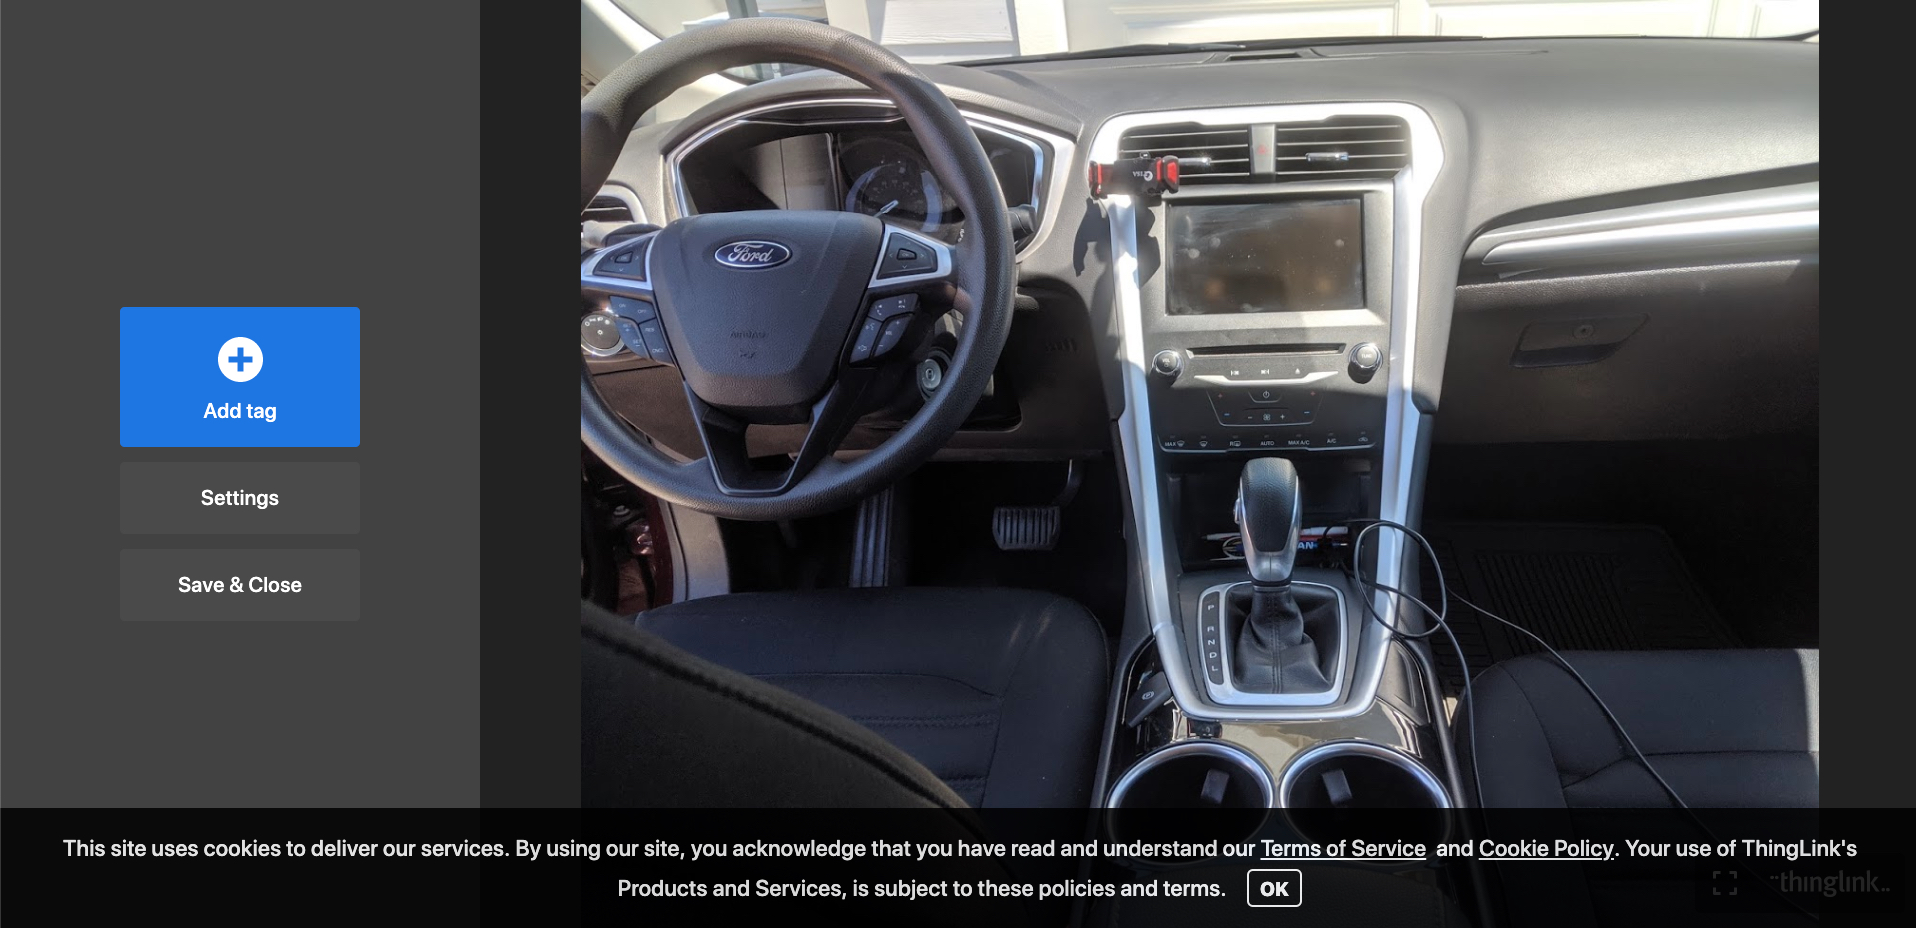
Fig 6
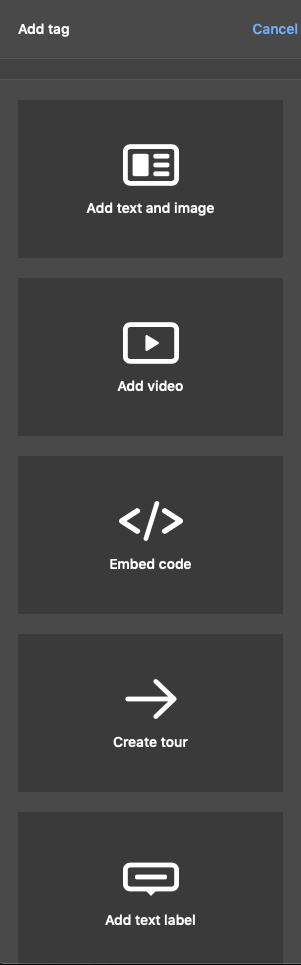
Fig 7
We will look at the two buttons: Add Tag and Save & Close. (Fig 6 .) First click on Add Tag button. You will see the choices (Fig 7) Add text and image, Add video, Embed code, Create tour, and Add text label.
I will describe each button. You should also try it out. With Add text and image, you can add both some text and an image on top of the image. Add video (YOUTUBE only) will allow you to add a YouTube video on top of the image. Embed code will allow you to embed a Google form, Google doc, Quizlet, Padlet, or anything that has an embed code. Create tour will allow you to add multiple scenes to create a digital story or a tour perhaps of your school. Finally, Add text label will allow you to add just text to the image. I am going to use Add text and image which allows me to add text along with audio. I added a add text and image to the photo, recorded the word "steering wheel" using a recording program and added to the tag.
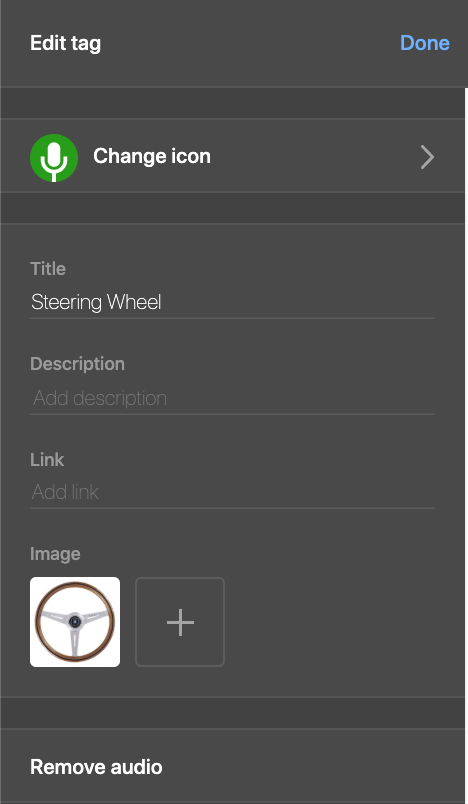
Fig 8
You can see in Figure 8 that I added an icon of a microphone. Just click on Change Icon to change it. I added an image of a steering wheel and I added audio. (You can’t see the audio, but I know it is there because it says to remove audio.) When you are finished, just click Done and then Save & Close. You can do this for all the items you want to tag. Try adding a label, a video, and an embedded object on top of your picture. Your finished product will have the tags on top of the picture. When you hover over the tag, you will see the image and the word and hear the word.
Those are the basics of making a Thinglink. There are apps available for both Apple and Android phones and tablets.
-
Apple: Thinglink on App Store

-
Android: Thinglink on Google Play Store
Fig 9
Look for the Icon (fig 9)
Tags can be made for 360 images and viewed with Google Cardboard or other VR goggles.
Educational Uses for Thinglink
Interactive images are a great way to review vocabulary, create school tours, and immerse your students in learning in a very creative and interactive way. You can take a look at some of the lessons I have made for students.
Images
360 Images
The possibilities are infinite. Thinglink is free except for student management tools. For student management it will only cost you $35.00. With student management, you can have your students create their own Thinglink and add them to your account. However, since the accounts are free, you can just have students create their own account.
Resources
-
Article on Getting Started with Virtual Reality in Adult Education
-
360 Images for Schools
You must join to see the photos -
360 Video Channel on YouTube
be sure to preview before using and this requires VR Googles to get the correct effect.