

Video Messaging with Loom
by Susan Coulter
By Susan Coulter, Baldwin Park Adult and Community Education
Posted January 2018
Loom is a new free Chrome Extension that allows you to quickly record a video message and/or screencast and then share it immediately with students and colleagues. You can embed the video in your Moodle course or on your Website. Loom also integrates well with Google classroom. You can share your videos via Gmail; and if you send to another Gmail user, Loom will insert a video player into your email so your video can be played inside your email. Videos can also be shared directly to Twitter and Facebook. What stands out about Loom is its ease of use.
As agencies are focusing more on outcomes, it is important to maintain personal contact with your students even after they have moved on with their careers. Video messaging is a great way to stay in touch. Students are more likely to respond to a personal video message from their teacher than a plain email.
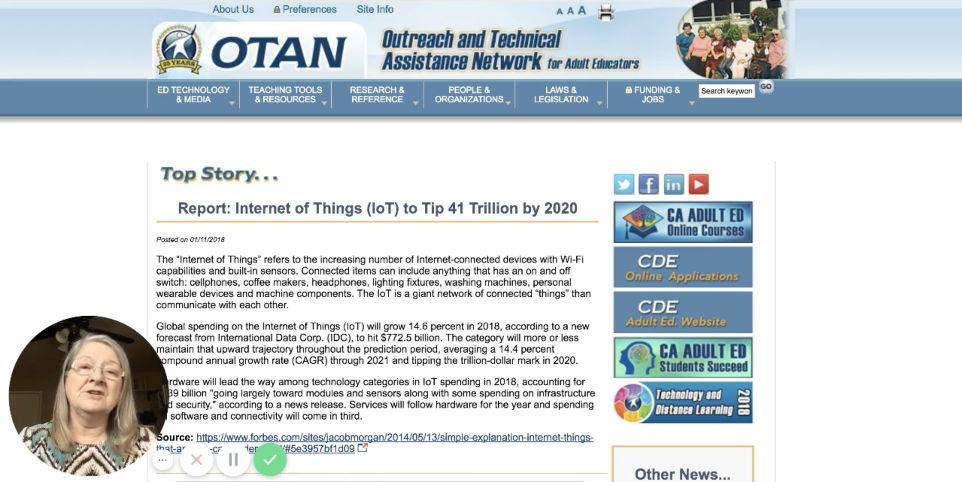
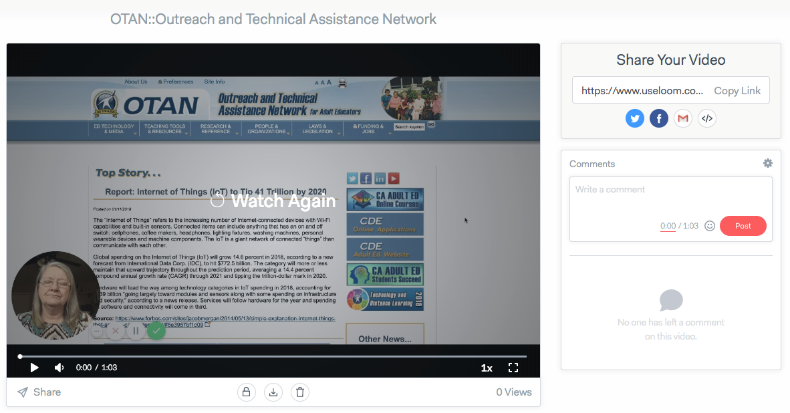
CAPTION: Screenshot of sample video talking about current and past Web-Based Activities. Loom video is found at https://www.useloom.com/share/6a2e3a73c36242d9a3c2f9865fd50fb5 Closed Captioned video is found at https://www.youtube.com/watch?v=VcLHsDCTuhg
Different Uses for Loom
- Send a personalized video message to students welcoming them to your course or telling them about upcoming events.
- Send a message to students who were not in class. Let students know that you missed them, what they missed in class, and what they need to know for the next class.
- Correct student essays and personally explain suggestions for improvement. This works especially well with Google Docs using the editing tool. I like to make corrections to student documents using Suggesting. This way the changes are merely suggestions and students need to consider each change and decide whether to accept the change or not.
- ESL teachers can photograph, scan or reproduce short dialogue from class and then demonstrate the correct pronunciation by reading it in a Loom video while showing the text. Students love the extra practice.
- Create a short screencast to demonstrate how to sign up for an account such as Gmail or how to find needed information on the Internet. Your screencasts can be easily inserted into Moodle or embedded on your Web site
Setting Up a Loom Account
-
Go to https://www.useloom.com/ and install the Chrome extension.
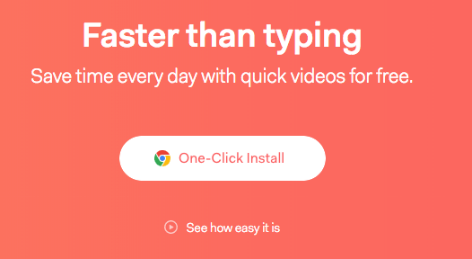
CAPTION: Image of the Loom Website showing the One-Click Install button. Text reads, Faster than typing. Save time every day with quick videos for free.
-
Sign in with your Google or Outlook account.

CAPTION: Image shows two selections. One is Continue with Google and the other is Continue with Outlook.
-
Loom allows you to create different folders to organize your videos; however, there is one folder immediately available titled How to Use Loom. There you will find videos on using Loom in Education.
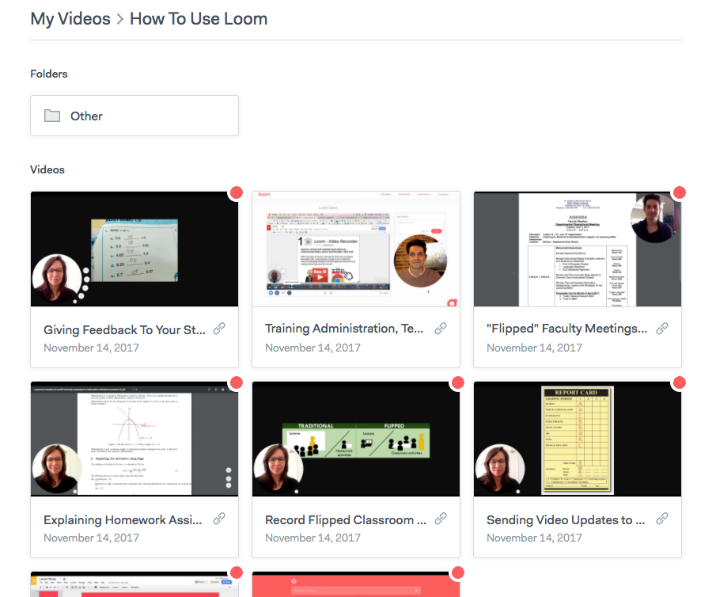
CAPTION: Image showing several of the videos in the How to Use Loom folder titled Giving Feedback To Your Students, Training Administration, Teachers and Students with Loom, “Flipped” Faculty Meetings, Explaining Homework Assignments, Record Flipped Classroom, and Sending Video Updates.
Creating a Loom Video
Loom allows you to create an unlimited number of videos.
Loom can be accessed by selecting the gray Loom icon in the top right-hand corner of your Chrome browser.
Record Settings
You can choose to record your screen and camera, just your screen, or just your camera.
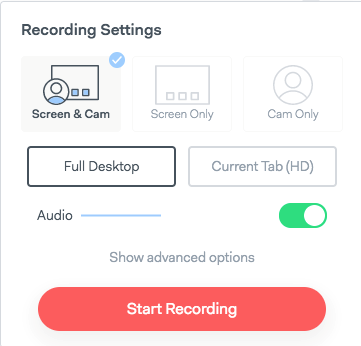
CAPTION: Image of Recording Settings showing Screen and Cam, Screen Only, Cam only, Full Desktop, Current Tab and Audio on/off tab. At the bottom of the image is a large red tab titled Start Recording.
Camera Image
There are three different sizes for your camera image, and the camera image can be easily moved anywhere on your recording screen.
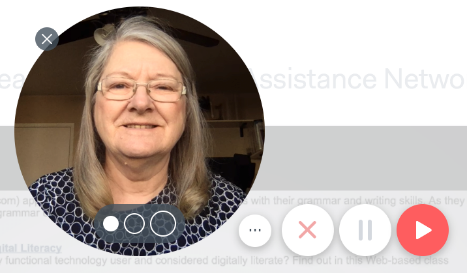
- Set the image size by selecting one of the circles at the bottom of your camera image.
- Click on the camera image and hold to move the image to a different location. While recording, you can pause your recording and then move the camera image to a different location or change the size.
-
If you are inserting a camera image, you will find the recording controls to the right of the image. To the far right is the recording button. You can use this to start your recording. Next is the pause button. You will want to use this if you need to move your camera or change your screen image. Once your recording is paused, you will use the same button to resume recording. The red x is to discard your recording. By selecting the three dots to the far left, you can hide the recording controls.

CAPTION: Image shows camera settings described in step five.
-
During the recording, a couple of the controls change. When you are finished recording, select the green check button. If you pause your recording, the pause button will change to a resume button.
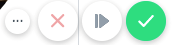
CAPTION: Image shows camera settings described in step six.
Screen Image
- In Recording Settings, you can select Full Desktop or Current Tab (HD). You will want to use Full Desktop if you are sharing a document from your computer. Current Tab (HD) works best for sharing a Web site, since it removes your browser’s tabs and URL bar, but if you are discussing multiple sites you will need to use Full Desktop.
-
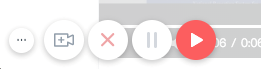
If you have selected Screen Only, the recording controls will be found in the bottom left-hand corner of your screen. There is one added button which allows you to add a camera image after you have started recording.
Sharing Your Video
-
When you are finished recording, select the green check mark. This will take you to your Loom account.
CAPTION: Image shows Loom account after recording.
-
To the right of your video is a Share your Video box. There are five different ways to share a Loom video. You can copy the link, post to Twitter or Facebook, send in a Gmail or and embed it on your Web site or in your Moodle course.
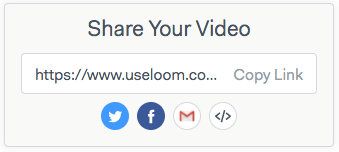
CAPTION: Image shows the Share Your Video box with the options of Link, Twitter, Facebook, Gmail, or embed.
- You can add a comment to your video by typing in the Comments box. In return, students can also add their comments.
-
You can also share your video using the Share dropdown box underneath your video.
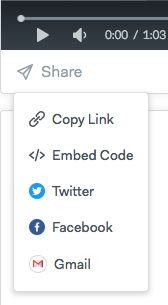
CAPTION: Image shows the Share Drop Down box with the options of Copy Link, Embed Code,Twitter, Facebook, and Gmail.
-
There are three more options found under your video to consider. The first allows you to add a password so only your students can view the video. The second downloads your video as an mp4 file. The last one deletes your video.
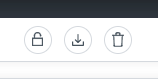
CAPTION: Image shows the three options found under your video for adding a password, downloading, and deleting your video.
-
Also below your video, you will find a box to add a link to the Web site you discussed. If you discussed more than one site, Loom will identify only the first site; however, you can add more sites and/or a message to your students.

CAPTION: Image shows the box under the video where you can add a link or message. Text reads, Add link to page you record on? The link is shown and then the word Add.
Creating a Loom Video in Gmail.
-
Go to https://www.google.com/ and open your Gmail account.

CAPTION: Image shows screenshot of a sample email with embedded Loom video.
-
In the upper left-hand corner select the red COMPOSE button.
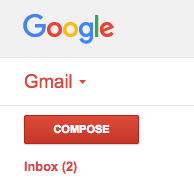
CAPTION: Image shows the upper left-hand corner of a Gmail account. Text reads Google, Gmail, Compose, and Inbox (2)
-
At the very bottom of your new message in the left-hand corner next to the blue Send, select the Loom icon.
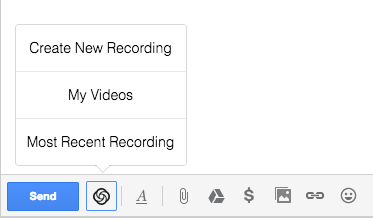
CAPTION: Image shows the bottom left-hand corner of a Gmail new message. With Loom icon selected, text reads Create New Recording, My Videos and Most Recent Recording.
- You now have three choices. You can create a new recording directly from your Gmail account, insert a video from your Loom account, or select the most recent recording.
-
Creating a new video is quick and easy to do. Once Create a New Recording is selected, you are prompted to select the Loom icon on your Web browser.
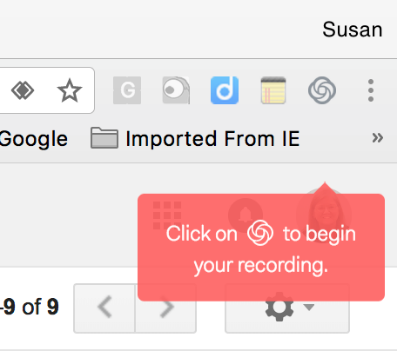
CAPTION: Image shows the upper right-hand corner Web browser and red box with text that reads, Click on (Loom icon) to begin your recording
-
The recording steps are the same as above except that you are not taken to your Loom account when you are finished. Instead, you have an opportunity to preview the video and then choose to Discard or Insert Video. In the example, I chose Cam Only in my recording settings so I could talk directly to the student.
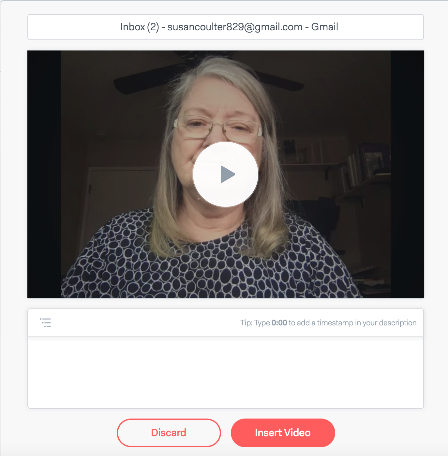
CAPTION: Image shows video recording and the white Discard button and the red Insert Video button at the bottom of the image.
-
Simply add recipient’s email and then Send.
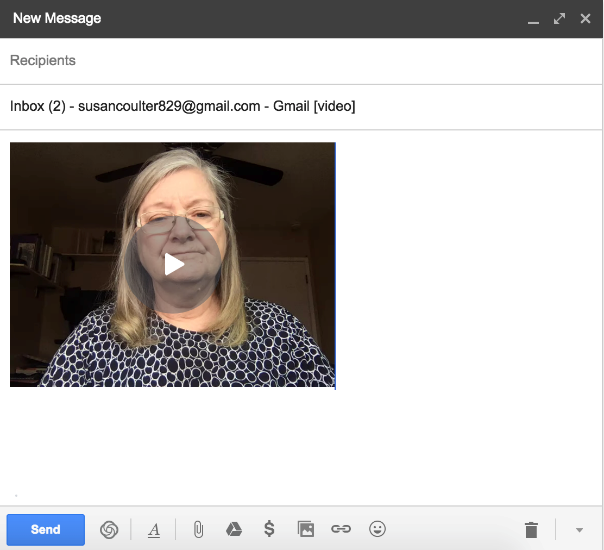
CAPTION: Image shows the final email with the inserted video player.
NOTE: This works only if a student has a Gmail account and opens the email through his Web browser. I have also been able to send a Gmail video to my Office 365 Outlook account. If a student does not have a Gmail account, it is best to send the Gmail through your Loom account. Loom inserts a link to your video.
In this activity, the instructor sends a video message to students about an activity, event, or assignment using Loom Video recorder. This can be a simple welcome to the class.
Preparation:
- Sign up for a free Loom account. A step-by-step guide can be found above.
- Decide on the message you want to send.
- Practice creating Loom videos and experimenting with the different options. See the above tutorial for step-by-step instructions.
- Check the computer lab for availability and, if possible, schedule a class time.
- Make sure all students have an email address. If not help them create a Gmail. You might want to create a Loom screencast showing students how to sign up for a Gmail account and then embed it on your Web site.
How To:
- Have your students send you an email introducing themselves and their goals for your class. Make a digital list of your students’ email addresses so they can be easily inserted.
- In the lab, send a video email to all students and check to see that they are able to receive and view your email.
- Help students that are having difficulty and resolve any technical issues.
- Consider sending a video email once a week, so students are used to checking their email. You can tell students what they will doing during the week, what to study, or contact students that missed class.