

Flipgrid: Promoting Critical Thinking Skills and Engaging Students
by Susan Coulter
by Susan Coulter, Baldwin Park Adult and Community Education, Baldwin Park, CA
Posted October 2017
Flipgrid: Promoting Critical Thinking Skills and Engaging Students
Flipgrid is an easy to use video discussion platform, which has numerous applications in the adult education classroom.
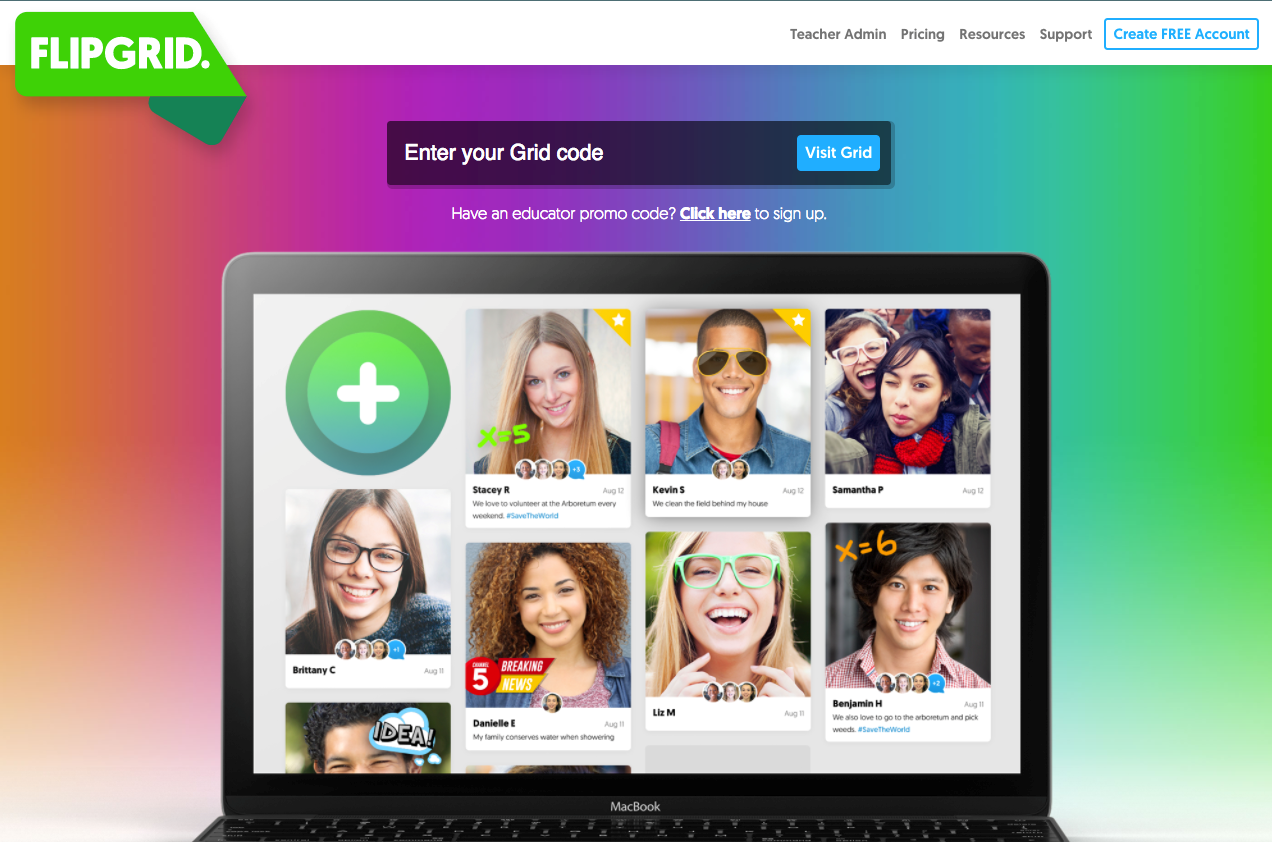
You can ask students to weigh in on critical events in the news; practice and record dialog; give their view of an article, book, or movie; share their favorite poem; or add a YouTube video to your topic and have students respond to its content. It is a great tool for English Language Learners. The short videos encourage students to plan their responses and to speak clearly. Students have the opportunity to record their response numerous times until they are satisfied with their post.
Flipgrid works well with any browser, Chromebook, tablet or mobile device; and integrates well with Google Classroom, Canvas, Blackboard, Moodle, Edmodo, Schoology and more. Students only need access to a device with a camera and microphone. The Flipgrid app makes it super easy for students to access.
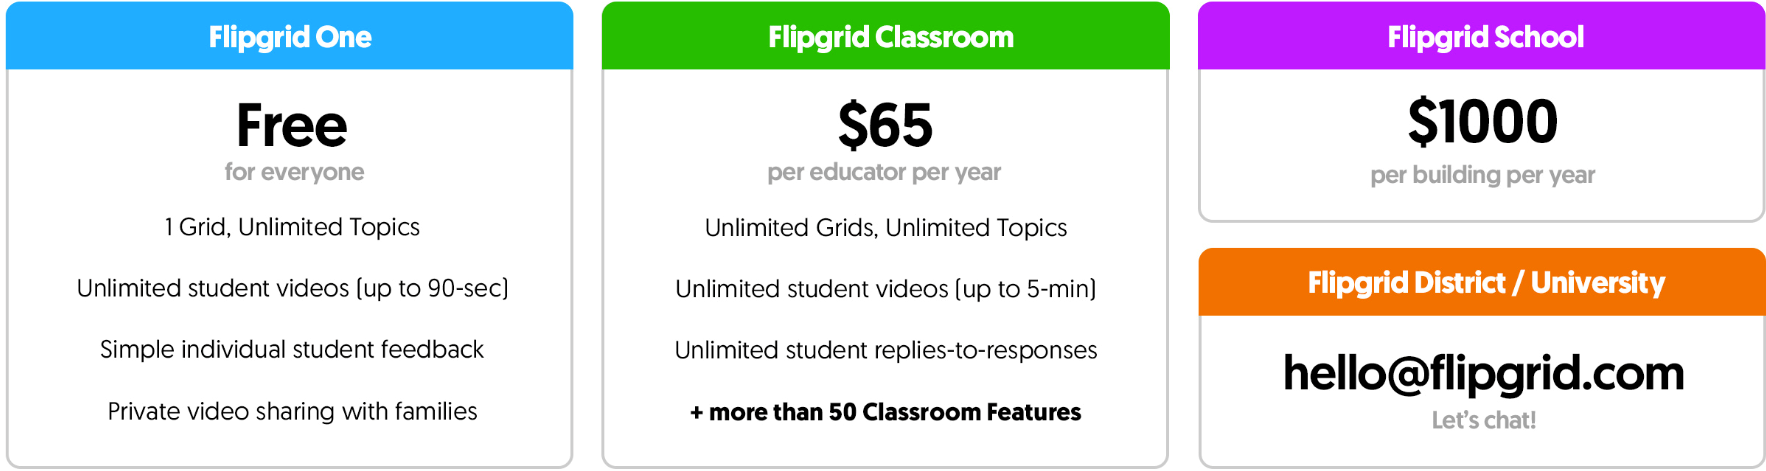
CAPTION: This is a chart describing the different available Flipgrid accounts. Flipgrid One is described below. Flipgrid Classroom is $65.00 per educator per year with unlimited Grids, Unlimited Topics, Unlimited student videos up to five minutes in length, unlimited student replies-to-responses, plus more than50 Classroom Features. Flipgrid School is $1000.00 per building per year and Fripgrid District/University gives an email address, hello@flipgrid.com and says Let’s chat!
Flipgrid One is a free version, which allows you one Grid, but unlimited Topics. A Grid identifies your classroom and Topics are your discussion prompts. Students can record a video response up to 90 seconds in length with the free version; they need only the grid code or topic link. Students do not need an email address to post and are asked only for their first and last name; however, only their first name and last name initial are posted.
Setting Up an Account
1. Go to https://info.flipgrid.com/ and select Create FREE Account in the upper right-hand corner of your screen.
2. Complete the sign up form and select Create my Grid! at the bottom of the page.
CAPTION: This image shows the blue Create My Grid! at the bottom of the page
3. Add a Grid by selecting +New Grid
CAPTION: This image shows Create FREE Account in the upper right-hand corner
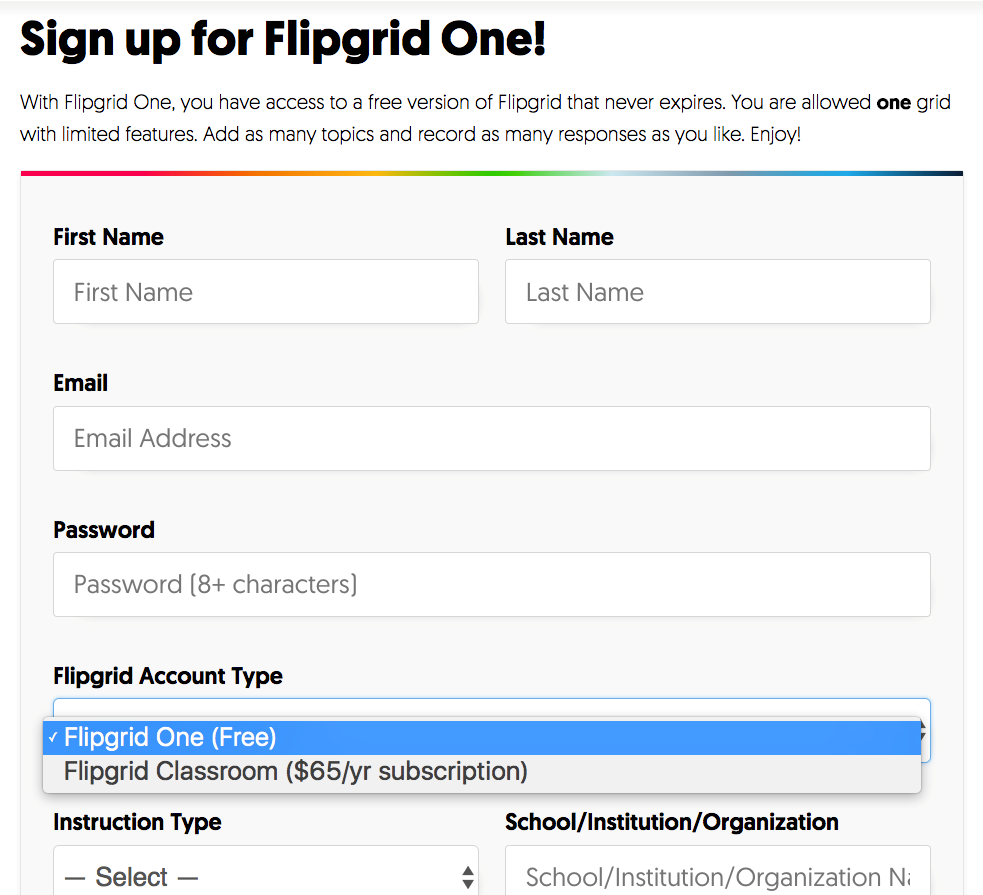
CAPTION: Shows the form for signing up for an account including First name, Last Name, email, Password and Account Type.
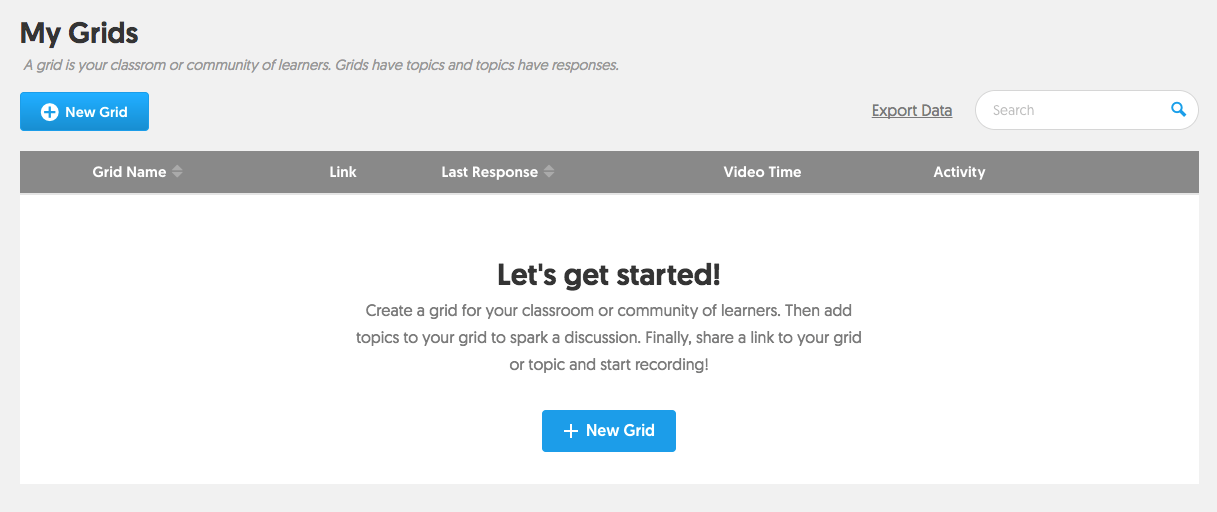
CAPTION: This image shows the Let’s get started screen and blue +New Grid button
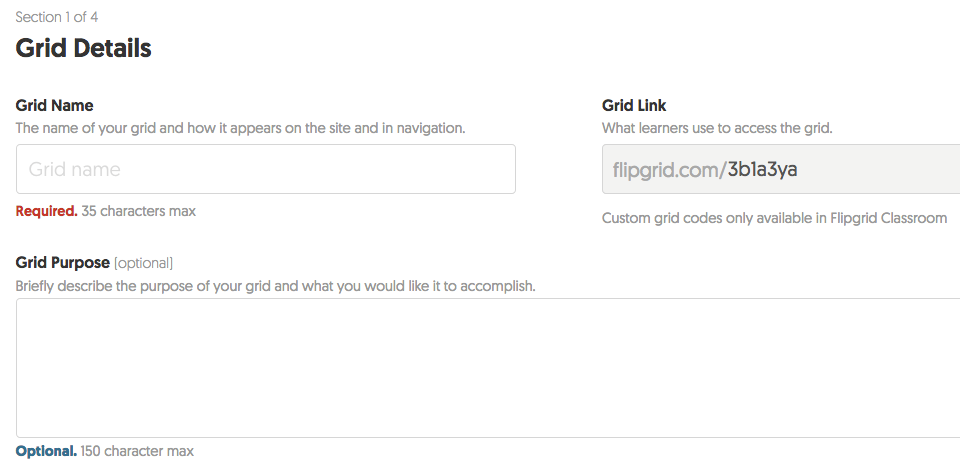
4. Grid Details - Give your Grid a name and optional purpose. Be sure to note your Grid Link if you want students to access your Grid instead of individual Topics. Flipgrid Classroom allows you to customize your Grid code; however, it is a paid subscription.
5. Security and Privacy – If you post your grid or topic links to an open Web site, you will want to set up a password. Students will need the password to view your grid or topics; however, a password is optional. You also have the option of allowing students to receive a notification when another student posts a video or when you post a new topic. This can be selected under Grid Followers. The last section allows students to download their video response.
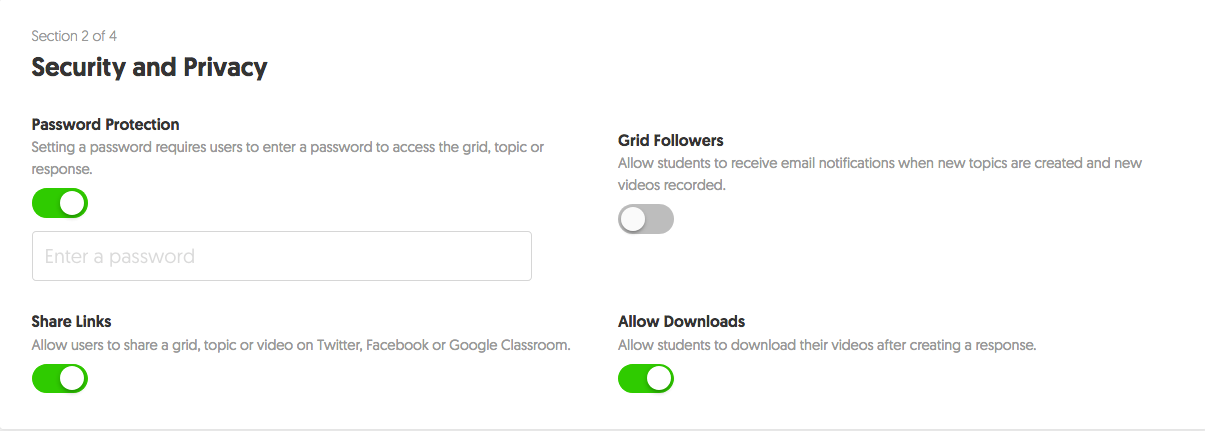
CAPTION: This image shows the Security and Privacy settings, which include, Password Protection, Share Links, Grid Followers, and Allow Downloads.
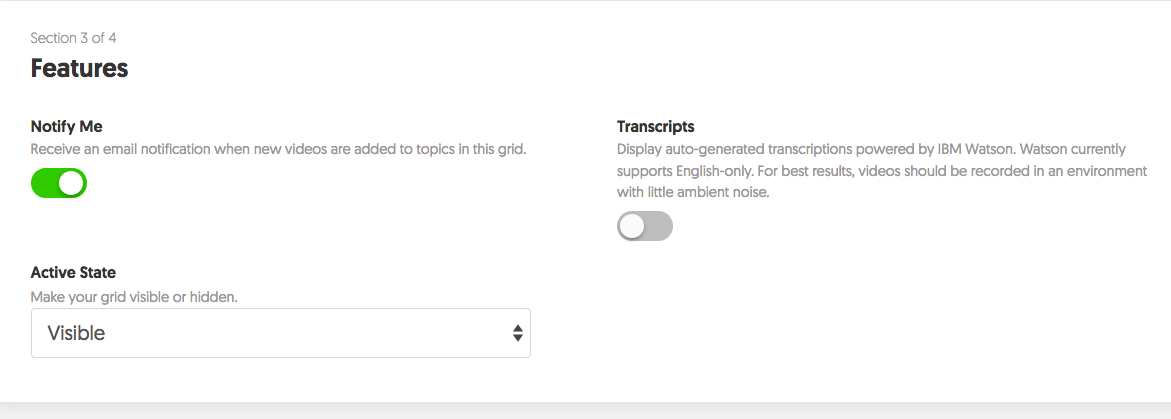
6. Features – Notify Me should be turned on if you want to be notified when a student posts a response. You also have the option to hide your grid under Active State. In the last section, Transcripts, viewers are able to see a transcript of the recording; however, if there is a lot of background noise, it will not be very accurate. More advanced students can correct the transcript.
7. Customize – Here you can select a header for your grid. There are 12 to 14 photos under the headings of Featured, Nature, People, and Textures. You also have the option of uploading your own photo, although, only .jpegs are currently supported. Flipgrid recommends using uploaded photos that are 1500 pixels by 500 pixels.
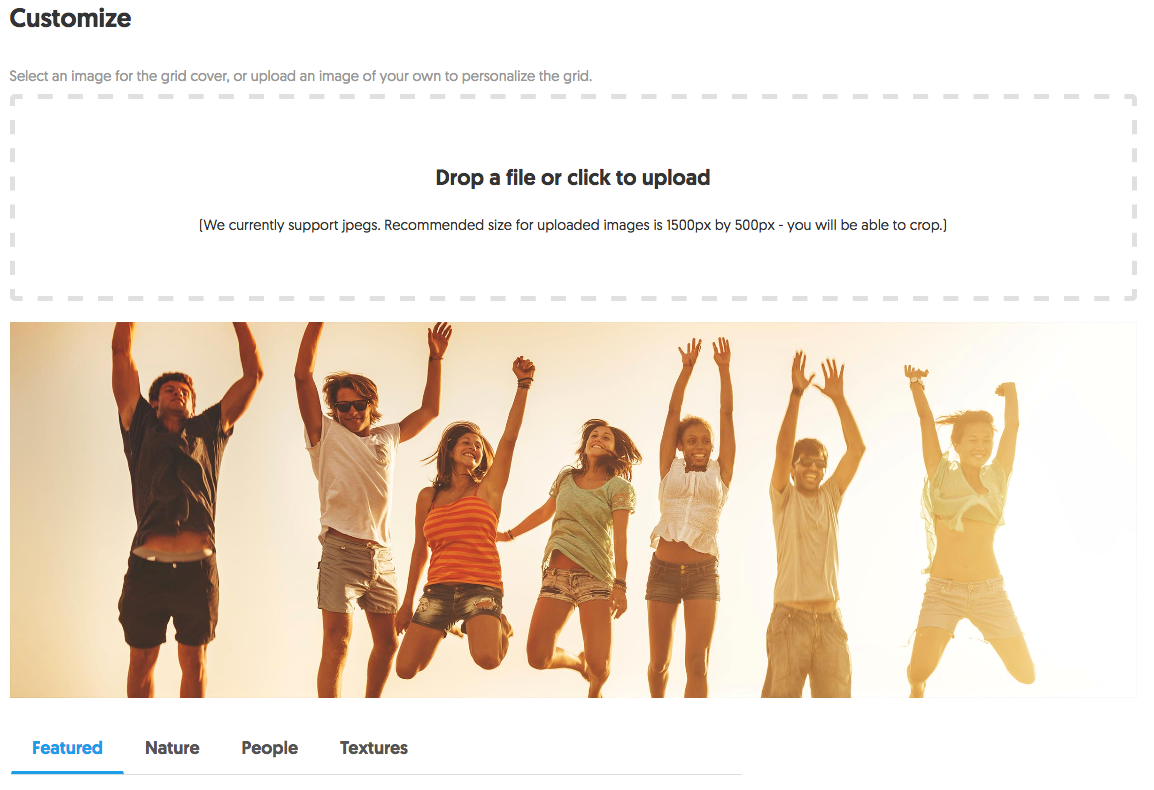
CAPTION: This photo shows the Customize settings. At the top there is a place to drop an original photo. Beneath the upload, there is a photo of seven high school students jumping in the air. There are also 13 photos displayed under the heading of Featured. The Create Grid button is located in the bottom right-hand corner.
8. Select the blue Create Grid button in the bottom right-hand corner to create your grid. You can go back to change your settings once it is created.
Adding a New Topic
1. Topic Details – First, give your topic a title. The video Response Time is automatically set for 1 minute 30 in the free version. Next, you will want to add your discussion question. You can insert hyperlinks to other sites or documents. Under Active State, you decide whether this topic is visible or hidden. With Frozen, students are able to view response, but are no longer able to add a response.
2. Topic Resources – In this section, you have the option to record your own video and speak directly to your students about the assignment. You can also upload a video from your computer, add a YouTube or Vimeo video, upload an image, or add an Emoji. One of my favorites is Add a Giphy. Giphy is a searchable online database of animated GIF files. All of these resources are amazingly simple to add to your topic.
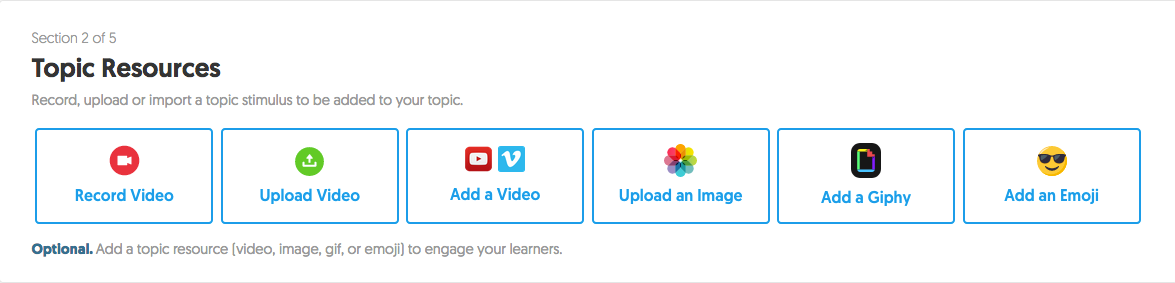
CAPTION: This image shows the Topic Resources available as discussed in the text above.
3. Topic Attachment – If you have a worksheet or dialog you want students to use, you can add a link in this section. Files can be uploaded to Google Docs or Dropbox and then linked to the discussion.
4. Response Features – In this section, you have control over student responses and selfies. After a student records a response, they must also submit a selfie, which can be decorated with stickers and drawings. Under Selfie Decorations, you determine what decorations are allowed. Response Moderation gives you the option of approving responses before they are made public. Response Reactions allows students to leave Emoji reactions on a post or to indicate that they like a post. Other features located under Response Features are Response Link, Response Title, and Require Email for Responses, and displaying Video Views. Replies to Responses is only available in the paid version.

5. Feedback – This section allows you to customize your feedback to the student; however, this option is only available in the paid version.
6. Select Create Topic. The only information your students need is the topic Link or the grid Code to be able to post a video response to your topic. Students can download the Flipgrid App on their device or use any browser to access Flipgrid.com.
Sample Web-based Activity
In this activity, students post a video response indicating their name and their goal for the class. Students are initially very hesitant and need something very structured and easy to record for their first assignment. Once students are familiar with Flipgrid, you can go on to more complex assignments. ESL students might work in small groups to record a dialog from their textbook. High school students might read a text or view a video and then give their conclusion or opinion of the resource. Flipgrid is a great way to promote critical thinking skills and get your students talking and expressing their ideas and thoughts.
Preparation:
- Sign up for a free Flipgrid Admin account and create your grid and first topic. A step-by-step tutorial can be found above. Write down your topic link.
- Download the Flipgrid app or enter flipgrid.com in your Web browser.
- Enter the topic link and view the discussion prompt.
- Select green +Add Response in the app or the round + symbol in your browser to open your camera. Initially, Flipgrip will ask for permission to access your camera and microphone.
- Press the red camera button to create a video response to your topic. If you are not happy with your recording, you can select the trashcan and try again.
- Practice with different devices and, if possible, with the devices your students will be using.
- If your students will be using their Smartphones, will they be able to connect to your school WiFi and will they need a password to get on it? Be sure to check your classroom WiFi and make sure Flipgrid is not blocked at your site.
How To:
- Introduce your topic and the class assignment.
- Demonstrate by making the first video response.
- Survey the class to see how many devices are available. Several different students can use one device. Divide students into groups to work on the assignment; however, you may need to help each group get set up. Background noise in the classroom can be heard on the recording, but it is still easily understood.
- Give students plenty of time to make their recordings and assist as needed.
- When everyone has had a chance to record, project the Flipgrid Web site on the board and play the first recording. Unless you pause the recording, it will continue to play the next recording. This first activity is just for fun and is used to familiarize students with the activity. Once students are familiar with the technology, you can assign topics that require more critical thinking skills.