

Simple Digital Storytelling with Adobe Spark Video
by Kristi Reyes
by Kristi Reyes, MiraCosta College, Oceanside, CA
Posted November 2018
Adobe Spark Video is a free digital storytelling application for desktop computers and with apps for Apple products that lets users make videos that include photos, text, music, voice-over narration, and transitions using a wide variety of templates and themes. Students can easily and quickly make short videos for several different class assignments, including “About Me” introductions, presentations, personal narratives, explainer and how-to videos, multi-media portfolios, and more. Teachers can see examples of all kinds of videos in the Adobe Spark Gallery and videos created by teachers and students including lesson plans in Adobe Spark Teaching Resources page.
For anyone who has ever created or had students make digital stories, you probably know that many video editors are complicated, and the projects can be very time-consuming. With the Adobe Spark Video app, however, it is so easy to use that even lower-level computer users can create stunning videos. Adobe Spark Video does not have all the bells and whistles of fancy video editors, but that is precisely what makes it easy to use, and projects can be completed in one class meeting if they are well-planned in advance. Students only need to sign up. There are royalty-free commons photos and music, but your own images and audio can be imported. When you use the built-in images and music, the app automatically creates a credits slide at the end of the video listing the photos and music used. There is no need to worry about whether or not you saved your work because the video creations are saved online. Furthermore, students will be engaged, have fun, and express themselves creatively.
To Get Started, for the Teacher
With Adobe Spark for Education, your agency manages and controls Spark access and data, and students and teachers use existing logins. No additional accounts or passwords need to be created. To use Adobe Spark for Education, your school’s IT administrator will need to deploy Spark to your school. If the school already has Adobe products, Spark is available from the “Adobe Admin Console.” The Deployment Guide helps school districts get started. You can also see the Adobe Spark Guide for Educators and Classrooms .
To Get Started, for the Student
- Go to https://spark.adobe.com/about/video
- Select “Start Now for Free” to create an account (the next time, just log in).
- Use a Gmail or Facebook account or sign up with another email address or an Adobe ID.
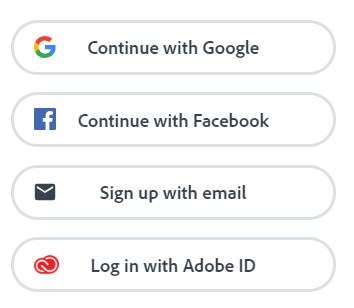
CAPTION: Four ways to sign up for Adobe Spark. Google, Facebook, email, or Adobe ID.
- Select “Get Started Now” or “Create a Video.”
- Select the + button to make a new creation. Enter your title (or select the “Skip” button if you don’t have a title yet).
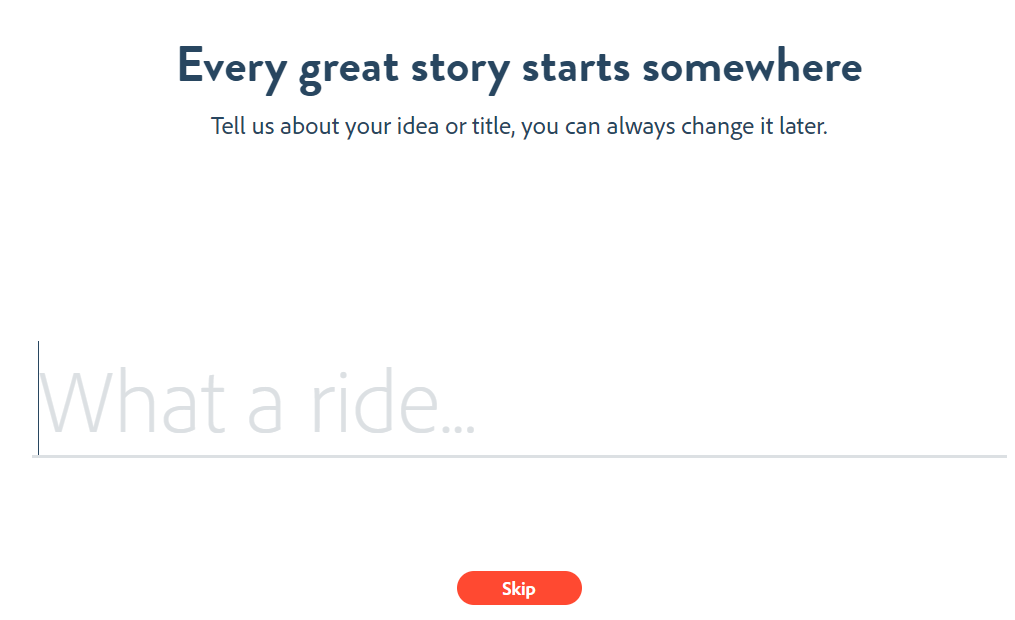
CAPTION: Opening page of Adobe Spark Video. Enter a title or skip.
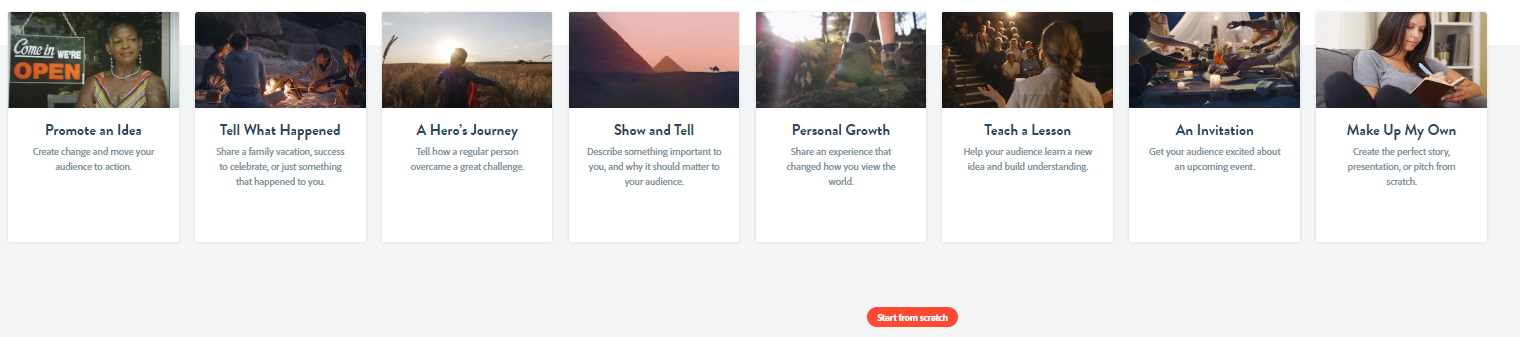
- Select a story template. The options are the following: Promote an Idea, Tell What Happened, A Hero’s Journey, Show and Tell, Personal Growth, Teach a Lesson, An Invitation, or Make up My Own, depending on what would best fit the task or assignment. When you select a template, sentence prompts appear in your storyboard to help you organize the speech or writing. You can also select “Start from Scratch.”
- Watch the short video demo, as desired.
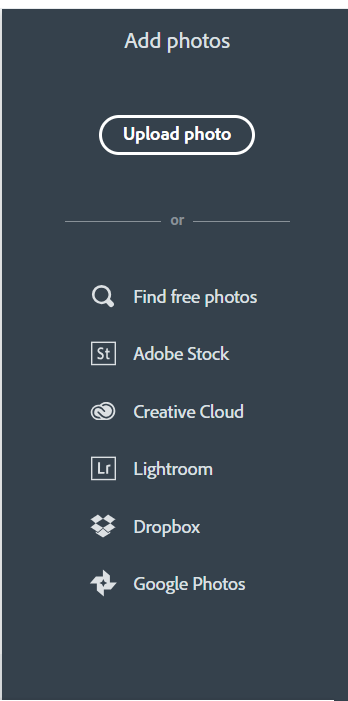
- Add photos. You can upload your own or search from the provided sources.
- As you add photos, move the mouse to the next space to the right. You can change the order of photos by dragging them where you want them to be. You can also add videos by selecting the “Video” icon and uploading from your device.
- If you want to delete or duplicate a photo, select the ellipsis (three dots …) on the top right of the photo and select the icon for the action you want to do (delete, duplicate, or play from here).
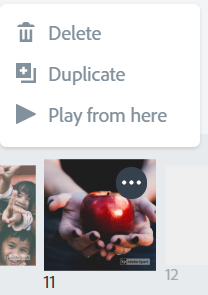
CAPTION: Image options.
- Select a layout for each photo. “Title and Text” would be a good option for the first photo. Type the title of your video in the title area and type your name in the text area.
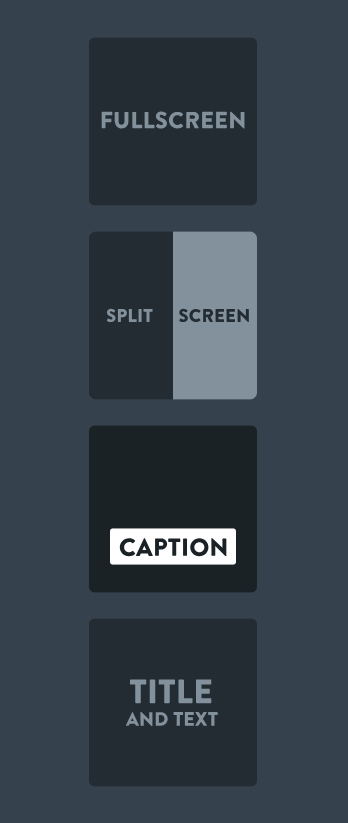
CAPTION: Layout option.
- To add text to a photo, click the + on the photo and select the “T” for text. Type in the text you want to appear with the photo.
- Select a theme (letter font style and transitions). You can move your mouse over each theme to see what it will look like in your video. If you select a theme and decide you don’t like it, just select a new one.
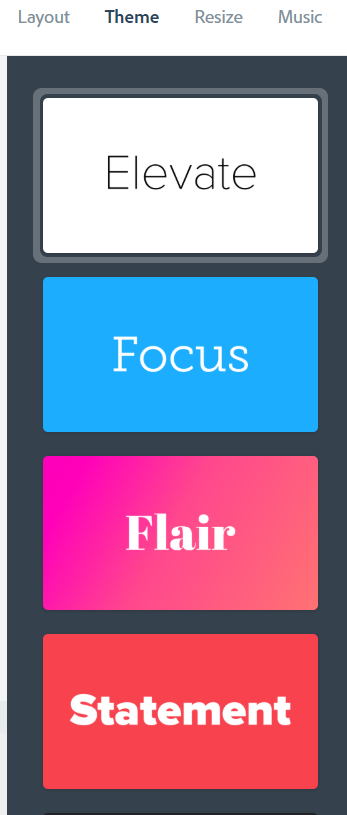
CAPTION: Theme options.
- Select “Resize.” Square may be the best option, but it depends on your photos.
- Next, select the music. You can also upload your own music by selecting “Add my music.”
CAPTION: Music options.
- Press the play button under your video preview area to hear the music.

CAPTION: Preview button.
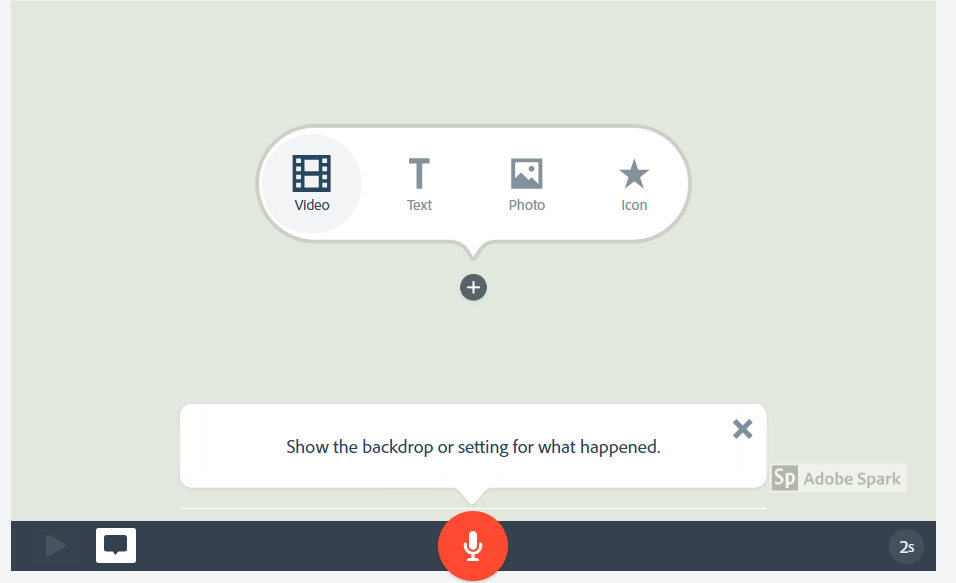
- Now you are ready to record your voice. Have ready what you want to say for each photo. Select the microphone icon and hold it down while you speak. You may see a message asking you to give permission to access your microphone. Select “Yes” if so. If you make a mistake or don’t like your recording, just repeat.

CAPTION: Microphone button for recording voice-over.
- You will know if your voice has been recorded if you see sound bars on each side of the microphone icon:

CAPTION: Audio recorded view.
- Note that you can only record 30 seconds of voice narration per image. You can change the length of time for the image by selecting the circle at the bottom right and then move the slider to change the duration. If you want to speak about an image for more than 30 seconds, just add the image to the timeline more than once and break up the narration into two or more parts.
CAPTION: Image duration slider.
- Preview your video by selecting the preview button at the top.
CAPTION: Preview icon.
- To go back to your video to make changes, select the X in the top right corner.
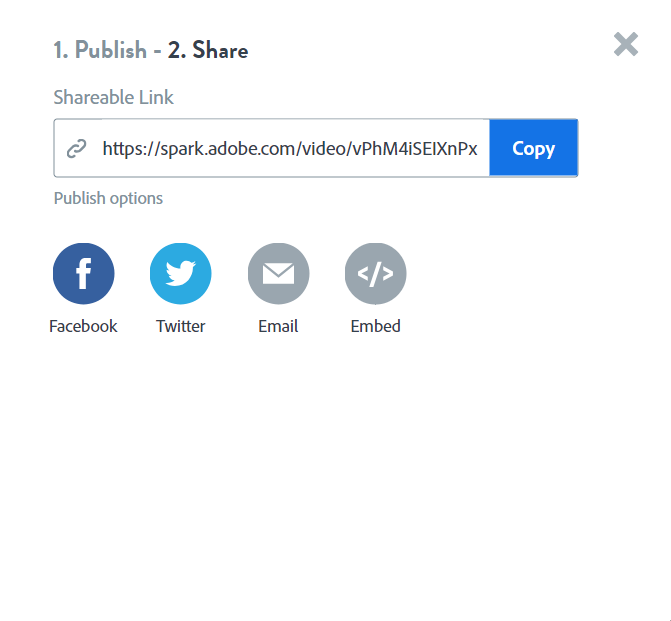
- To share your video, select “Share” at the top. Add a title if you don’t have one and optionally a subtitle. Select a category (Education) and then the “Create link” button will be activated. (You can also download your video as an MPEG-4 movie to the desktop of your computer by selecting the download button).
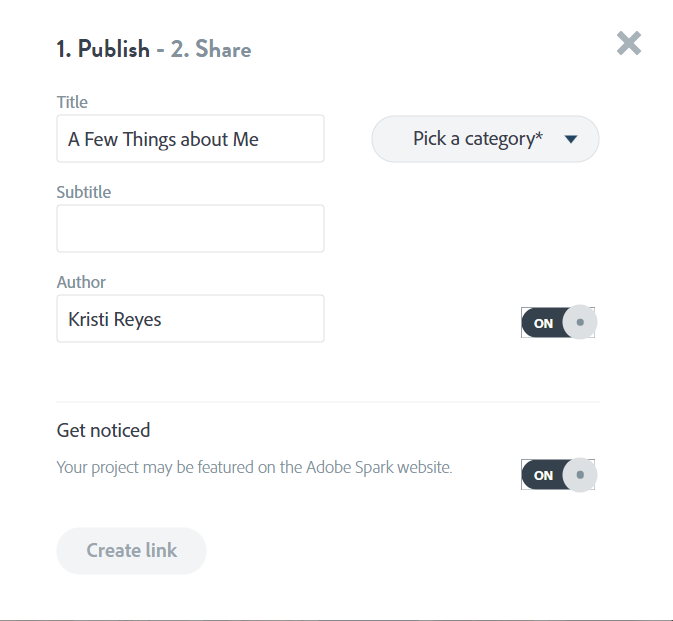
CAPTION: Publishing page.
- Wait for your project to render.

CAPTION: Rendering video page.
- After the video has rendered, you will see sharing options.
CAPTION: Share or download options.
- Your project will then have a URL that you can share on social media, email, or embed in a website. Select “Email” and type in your teacher’s email address. You will also receive an email at the address you used to create your account from Adobe Spark with a link to your project.
CAPTION: Sharing options.
When you log back in to Adobe Spark, your project will be visible, and you can select it to edit at any time. You can also download the videos for offline viewing.
Activities and Examples
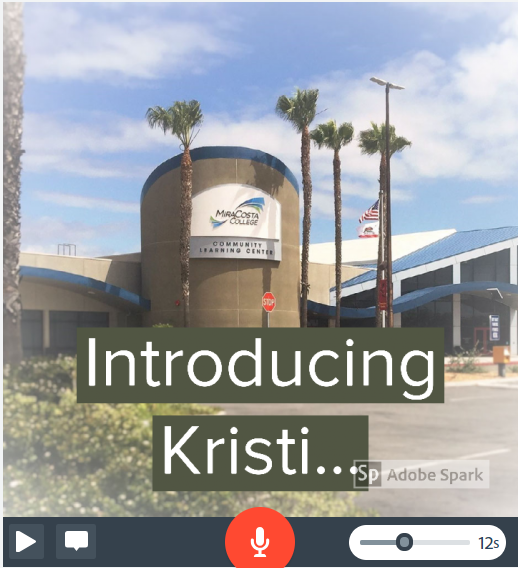
Introductions: This is my example of a simple introduction , which students viewed and subsequently created their own introduction videos as an ice-breaker activity in a recent class. Teachers can email their students an introduction and explain about the class and expectations before a class begins or during the first week.
Another activity is to have students use target vocabulary or grammar and create a video talking about themselves. For instance, in this example, students in an ESL class followed my model to practice using gerunds and infinitive. This was the prompt:
Introduce yourself to the class first by writing your name and where you are from originally. Then answer some questions using gerunds or infinitives, as required by the verb. Here are the questions (choose any 4 - 5 to answer in complete sentences): What do you like doing? What do you dislike doing? What are you happy or enthusiastic about? What are you worried about? What are you proud of? What is something you know how to do well? What is something you believe in? What is something you always forget to do? What is something you would like to do in the future? If you were famous, what would you be famous for?
Videos about class topics: In this example, a colleague’s student made an informational video about the need to recycle plastic in a unit about the environment.
Videos about traditions or customs: One student made this video about the Sky Lantern celebration in her native country, Taiwan.
Personal narrative digital stories: Students can brainstorm topics from prompts such as the following.
Think about your interesting life experiences. Write a few words for each of the following.
- The funniest thing that ever happened to me
- My most unusual or strangest experience
- An experience that was dangerous, adventurous, or exciting
- An experience that made me feel proud or happy
- A scary experience
- An inspirational experience
- An embarrassing experience
- A sad or disappointing experience
- A special first-time experience (e.g., first date, first job, etc.)
- An experience moving from one place to another
- Any other significant, memorable, or important experience in your life
Then they can draft their stories and revise and edit from the teacher’s feedback. The next step before starting their Spark Video project is to storyboard their narratives. In this step, students list key words for photo searches and titles. This is an example of a storyboard:
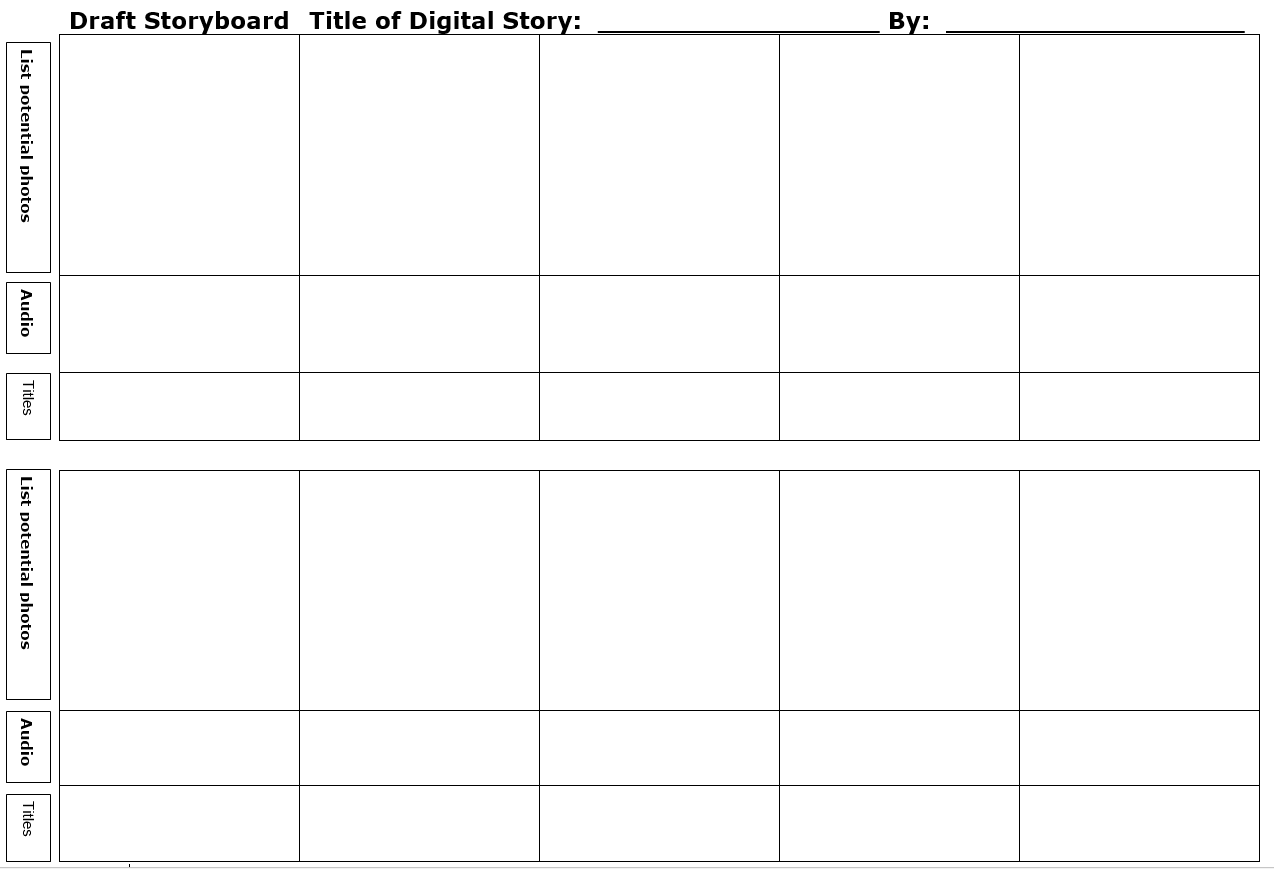
CAPTION: Sample Storyboard.
Other ideas for using Adobe Spark Video are the following:
- Book report or review
- Class reports
- Class welcome
- Field trip
- Foreign country tourism videos
- How-to videos
- Photo essays
- Spoken-word poetry assignments
- Tutorials
The possibilities for Adobe Spark Video are endless, and best of all, it’s easy for students to use.
Resources
The PD: Creativity and Digital Storytelling with Adobe Spark Kit technical tutorial on Adobe Education Exchange provides guidance on how Spark can be used in the classroom and contains materials for training teachers.
With Adobe Spark’s other products (Post for graphic designs and Page for Web sites), you can create a wide range of digital products including advertisements, banners, cards, covers, flyers, invitations, brochures, menus, pamphlets, posters, certificates, newsletters, resumes, and more.