

Survey, Quiz, and Schedule Appointments Skillfully with Google Forms
by Cindy Wislofsky
Cindy Wislofsky, OTAN Subject Matter Expert
posted November 2022
You've heard of Google Forms. You've taken a survey. You'd like to make your own survey and see the results in different ways. You've heard you can make a gradable quiz, too. And, what's this about scheduling appointments? It's time to review what you know already about Google Forms and move forward learning and practicing some newer features to make your work life more efficient and productive. Are you ready?
1. Basic Overview 
Google Forms is one of Google's free web-based applications (like Google Docs, Sheets, and Slides) that allows you to create surveys, quizzes, and more in an easily produced and shared format. Images, video, and links can easily be added. Your audience can respond to your form on any device (phone, tablet, or computer). Then, results can instantly be viewed in a spreadsheet or with colorful charts and graphs. It is also ideal for the blended learning settings as you can share the form and results, either in person or online, in a snap. When creating a form, Chrome is recommended as the browser of choice, and you may need to log into your account if you haven't done so previously.
-
Surveys
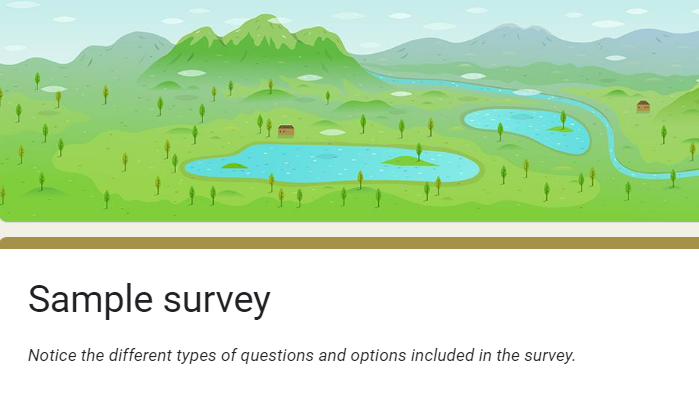
In the educational arena, you might want to create a form as a survey. What are some uses for a survey you ask? Perhaps to gather student information (emails, goals, technology comfort); to do a pre-lesson topic familiarity check; to gather content or personal feedback anytime during the semester; or to ask staff or students for preferences (meetings, committees, extra-curricular interests), or school/class improvement ideas. You could require a name or make the survey anonymous. You could also use a built-in template to save time. Here is a sample survey to check out.
Sample Survey Showing Different Question Types
-
Quizzes
How about a quiz? Depending on the question types you choose, the application can automatically grade the quizzes for you (more time saved!), notify you when a quiz is submitted, and show all the results in a spreadsheet. In addition, you have the option of manually grading open-ended questions. Regardless, you decide how many points each question is worth and can set the questions and/or responses to automatically shuffle (so helpful to cut down on ‘working together' temptations in on-campus classes!).

-
Scheduling
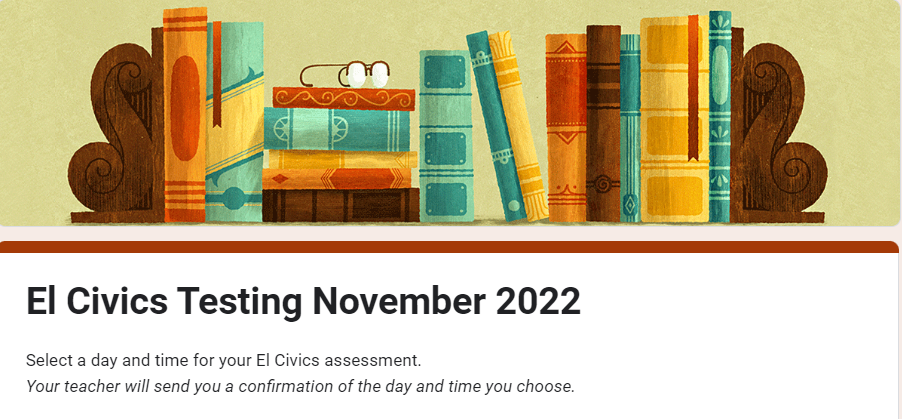
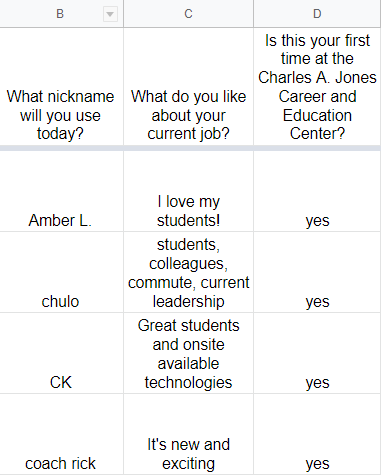
And what about scheduling appointments or presentations? With a simple add-on, you can have students pick a day/time for an appointment or a topic for a presentation and have that selection automatically eliminated so subsequent students cannot make the same choice. Then, results can be viewed in a spreadsheet so you can get an overview of their picks.
Sample Appointment Form Using Add-On
2. Getting Started
Google Forms is most often accessed through one's Google Drive account and all your forms will be stored there. Log into your account on your computer, then go to New/Google Forms to open a blank form.
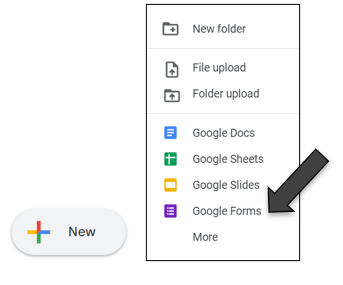
Alternately, you can start a new form by typing forms.google.com in your browser (which brings you to a list of all your forms) and selecting the plus in the bottom right corner OR by typing forms.new.
-
Blank Form
To get started or to review, note the numbered items and their features on a new blank form.
-
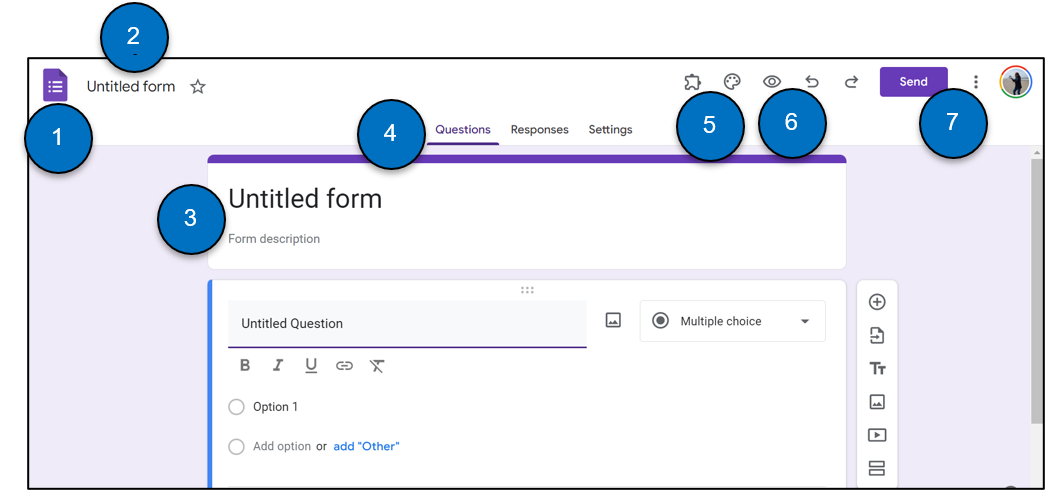
- Go to your list of saved forms from this Google Forms icon.
- Name the file for your records on the ‘Untitled form' line.
- Name the ‘Untitled form' for your audience and then provide a short description if desired.
- Notice the three tabs above the form. Questions (to edit form, add questions); Responses (once gathered, to view responses in different ways); Settings (to make quiz, choose presentation and response options).
- Add-ons symbol; Palette symbol to change theme (font, header, color).
- Eye symbol to preview form; Undo/Redo arrows.
- Send button for ways to get the form to your audience. Three vertical dots for More options (to copy, trash, print, add collaborators, choose add-ons).
-
-
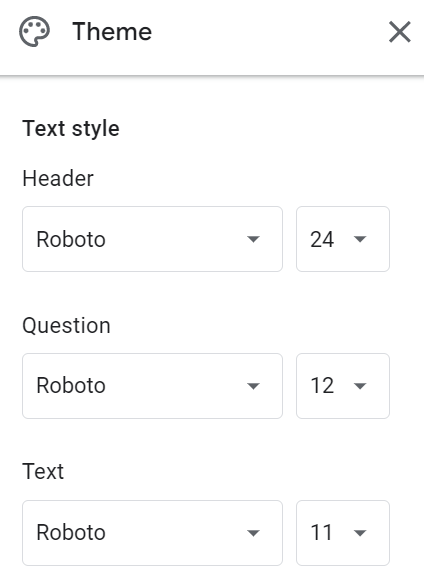
Themes
From the palette symbol in the horizontal toolbar above your form, you can easily change the font style and header color or image. If you haven't made a form in a while, you will notice that you can now have a different font style for the header, question, and answers/other text as well as font size. More options!!
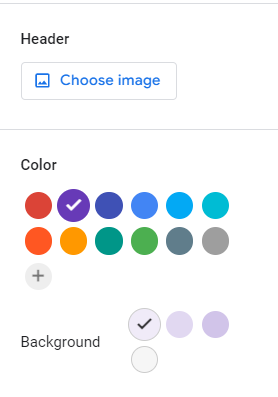
Choose your header image or form colors with multiple choices.
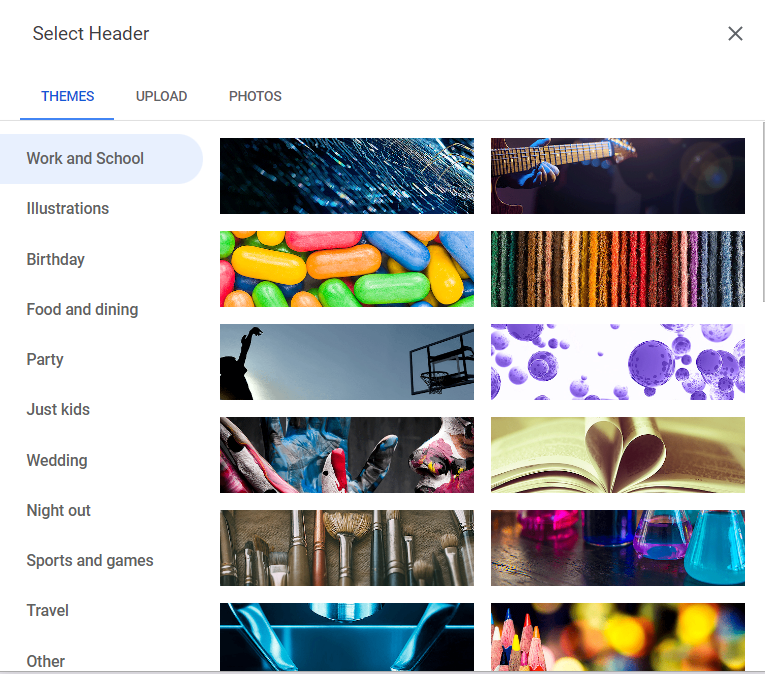
There are numerous header images to choose from in several categories in the left column of the Themes menu. In addition, you can upload an image from your computer.
-
Question Building
Look at the key numbered items for a new question and their features below.
-
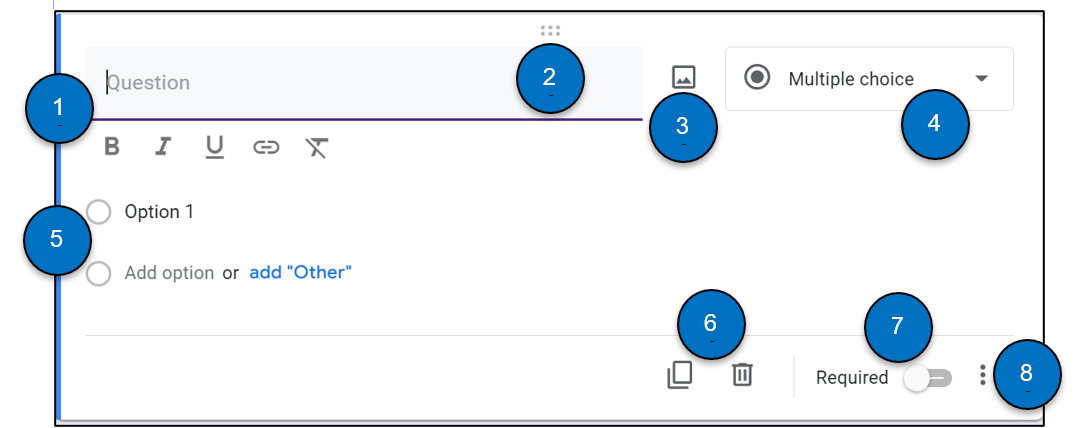
- Use the Question line to add your first question. Notice underneath, you now see bold, italics, and underline choices. This is a NEW, welcomed feature to enhance your text. You can also insert a link or clear the formatting with the two other symbols.
- Six small dots to grab this question box and move it up or down to reorder questions in your form.
- Add image to this question from your computer, Google Drive, Google search and more.
- Choose down arrow for question types (short answer, multiple choice, checkboxes, dropdown, scale, grids, etc.).
- Type your answer options here.
- Copy symbol (another time-saver if questions or answers can be easily altered to make another question. Delete question with the trash can.
- Make a response required. Determine which of your questions (or all) must be answered by your participants.
- Three dots for more options (depending on the question type: e.g. show description, shuffle answer order, response validation – such as require answer be in number format if you are requesting a phone number).
As with other Google applications, remember that your form edits are automatically saved, and you can preview your form anytime to make sure it meets your expectations!
-
-
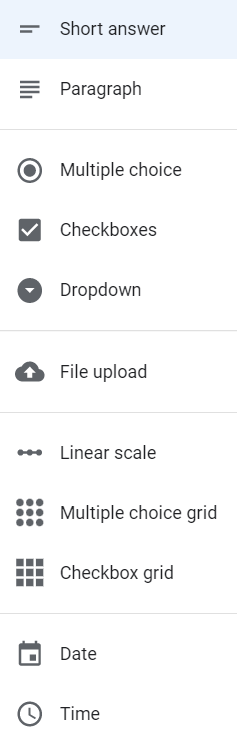
Question Types
There are eleven question types available. Circles signify only one answer can be chosen. Boxes mean multiple answers are okay. File upload is for respondents to add a file from their Google Drive account. You can designate which file type and size is allowable. All uploads will go to a folder in YOUR account. Date and Time are for respondents to insert their own choices.
-
Vertical Toolbar
Situated on the right side of each question, use these symbols to build your form. As with other form symbols, you can always hover over each to view their function.
-
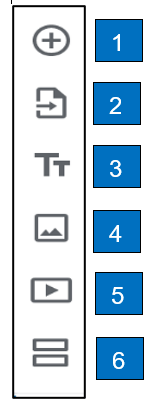
- Plus symbol to add a new question to your form.
- Arrow on paper to import a question from another Google Form you have made (one more timesaver!). When you select it, a list of all your forms is displayed. Choose the form, then select one or more questions to import.
- Double T to add a title and description.
- Picture symbol to add an image as a separate item.
- Play video symbol to add a video from your computer or YouTube.
- Two stacked rectangles to add a new section to your form.
-
-
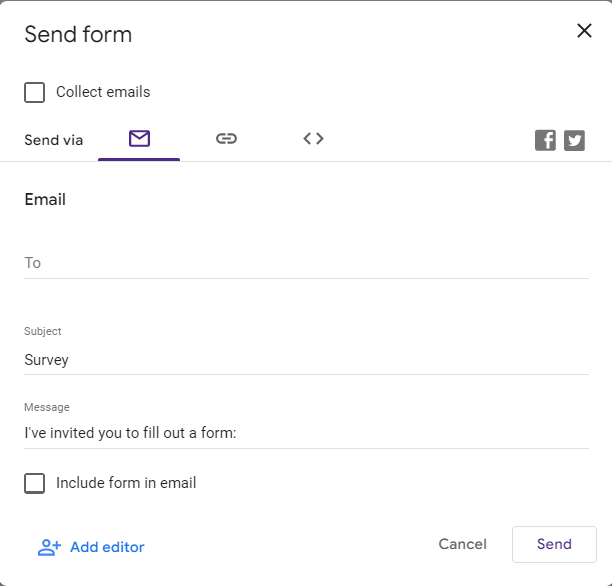
Sharing Form With Audience
Just like with other Google applications, clicking on the Send button in the top horizontal toolbar will open a window of choices. Decide if you want to share the form to your audience by email, link, or embed code. You can even share via Facebook or Twitter. This is also where you can quickly add a colleague as an editor.
If your audience is in-person and will be using their phones, consider generating a QR code for easy access. Did you know you can get an instant QR code in Chrome? With your preview open, click on the Share this Page icon to the right of the URL.
 Download, copy, and share in a presentation or copy it onto a piece of paper to post in the room.
 -
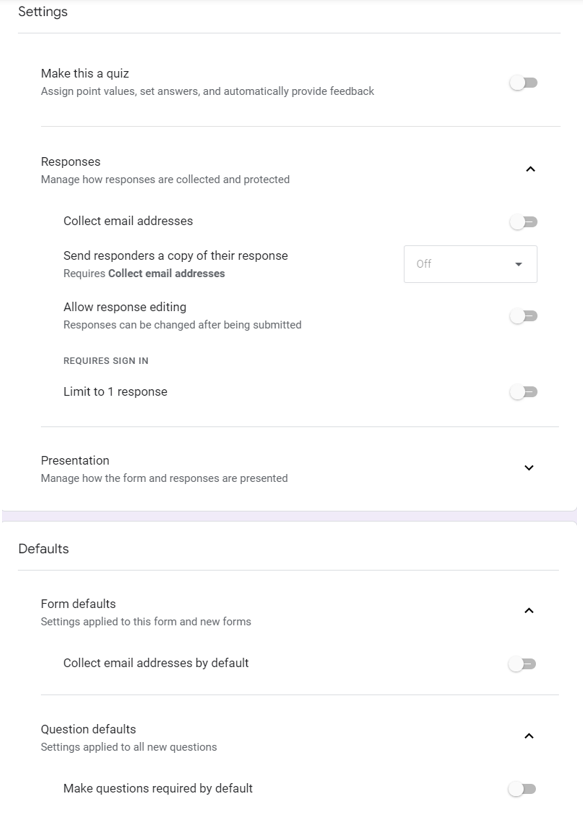
Settings Choices
Make additional decisions under Settings to change the form into a quiz (which leads to more options), whether to collect emails, allow participants to edit before submitting, make all questions required upfront (and un-require individual questions as desired), and more.
3. Quiz Options
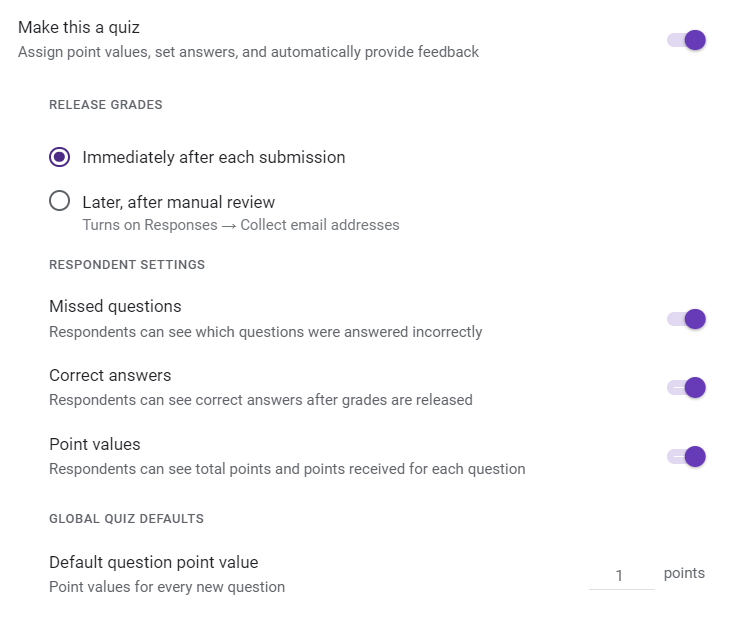
Once you turn your form into a quiz in Settings, you can choose to have scores displayed to students immediately after submission or only after you review their answers, whether to show them their incorrect and/or correct responses, and assign an automatic point value to each question (which can be changed on individual questions later as desired). Use toggle or radio buttons for most selections.
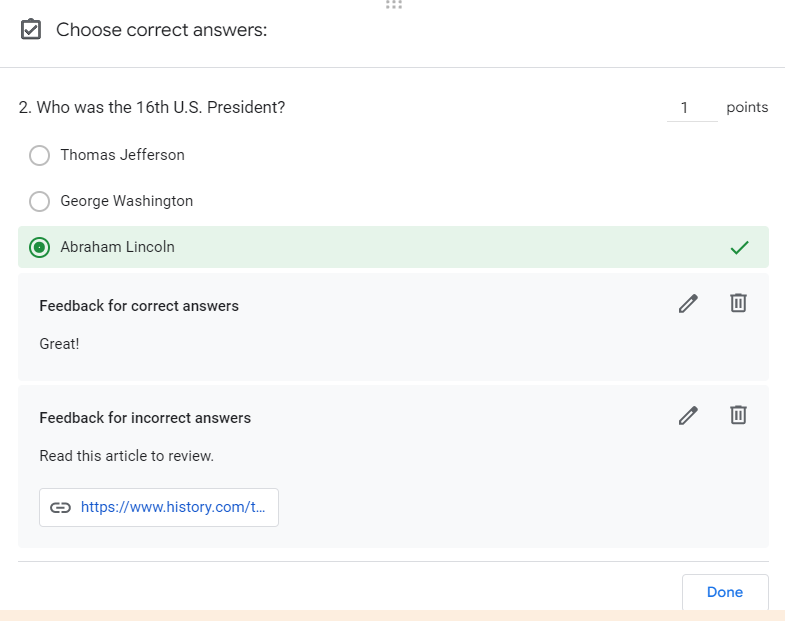
Quiz Question Answer Key
Besides identifying the correct answer for each question and manipulating the point value if needed, a terrific quiz feature is the ability to give different pre-determined feedback for correct versus incorrect responses. At the bottom of each quiz question, choose Answer Key to see all your options. Choose the pencil to input feedback for correct and incorrect responses. You can even include a website link to direct students to review the subject matter if they didn't give a correct response.
4. Viewing Responses
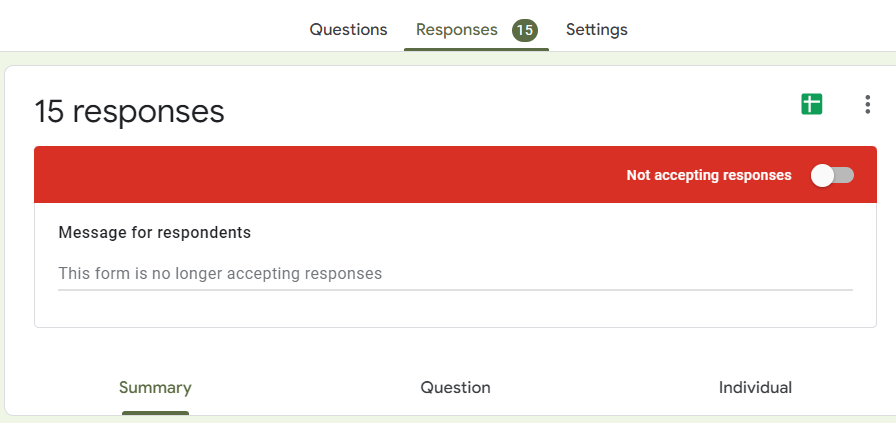
Now that participants have taken your survey or quiz, use the Responses tab above the form to see the results. Toggle the Accepting Responses button to turn off your form. Notice the number of responses and the three tabs below, Summary, Question, and Individual.
-
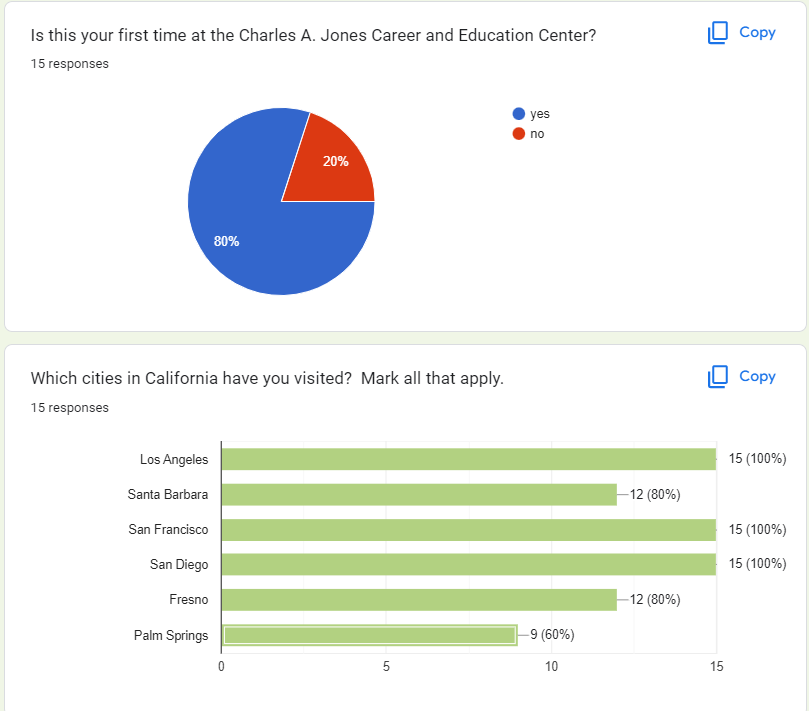
Summary of Responses
Automatically-generated pie charts and graphs will illustrate results from multiple choice and checkbox questions viewing in the Summary tab. Use the copy icon to share interesting results with others.
-
Review Question by Question
You can review the results from each question independently with the Question tab. Use the left/right arrows to scroll through the questions one at a time. Here you can see there are 6 questions and question number 5 is displayed.

-
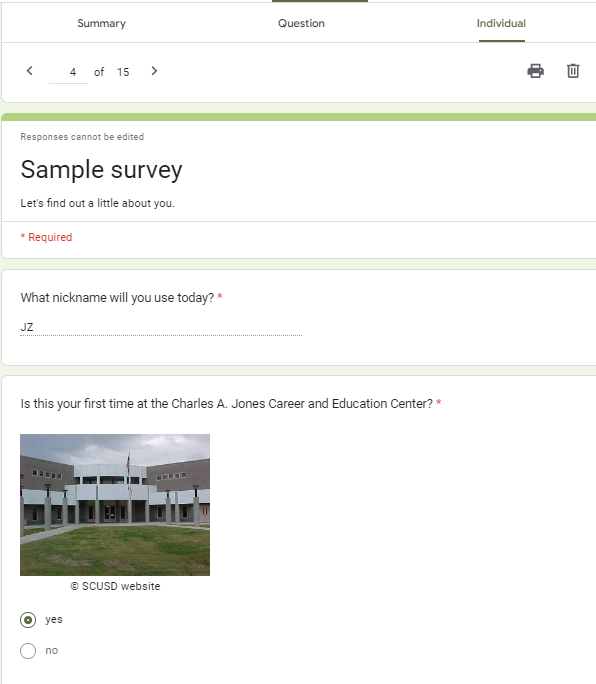
Review Individual's Responses
Lastly, you can look at a list of just one person's responses by selecting the Individual tab. Here you see responder #4 of 15 respondents is displayed. Icons to print this responder's answers or delete them are available in the top right.
-
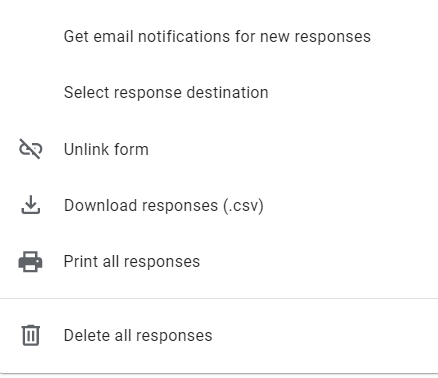
Deleting All Responses
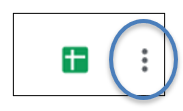
A way to save a survey or quiz for reuse down the road is to delete all the responses in one swoop. To do that, choose the three vertical dots menu when on the Responses tab, then choose Delete all responses at the bottom.
-
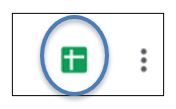
Create Spreadsheet of Responses
Another way to view results is by having Google Form create a spreadsheet for you. Select the green spreadsheet icon from the Responses tab and see your results all together in an instant spreadsheet. If your form is a quiz, you will see a separate column with individual scores.
5. Special Features
-
Adding Audio
What about reading the questions/answers to your audience or making the answer choices only aural in nature? Here are two simple ways to add audio to your form. Notice the example audio in items #7 and #8 in the sample quiz (same quiz as in 1b above).
- Access the voice recorder on your phone or download one to your phone. Record the audio, name it, upload it to your Google Drive, copy the link and paste it into your form.
- Use an easy voice recording online tool like Vocaroo. Open site and start recording, then copy/paste recording into your form. Vocaroo also allows for downloading (good for saving on your computer or upload to your Google Drive) and getting a QR code.
Note: If the URLs are too long for your purposes (or when sharing entire form), use a free URL shortener such as Bitly.
Alternatively, you could install a Chrome extension like Mote to record audio that will create play buttons directly into your form questions, rather than the audio opening in a new browser tab. Here's a short 5 ½ minute video from The SpEd Tech Teacher with a demo using Mote – Using Mote with Google Forms for Read Aloud
-
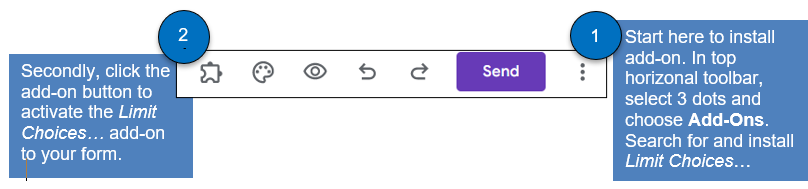
Add-Ons for Scheduling Purposes
When scheduling appointments or presentation topics, consider using an add-on that will make the process run more smoothly as the program will do a lot of the recordkeeping for you. To make choices for your audience that will be eliminated as individuals sign up or to limit the number of individuals who can choose any one item, Limit Choices, Limit Options and Remove Choices is a great add-on to do that.
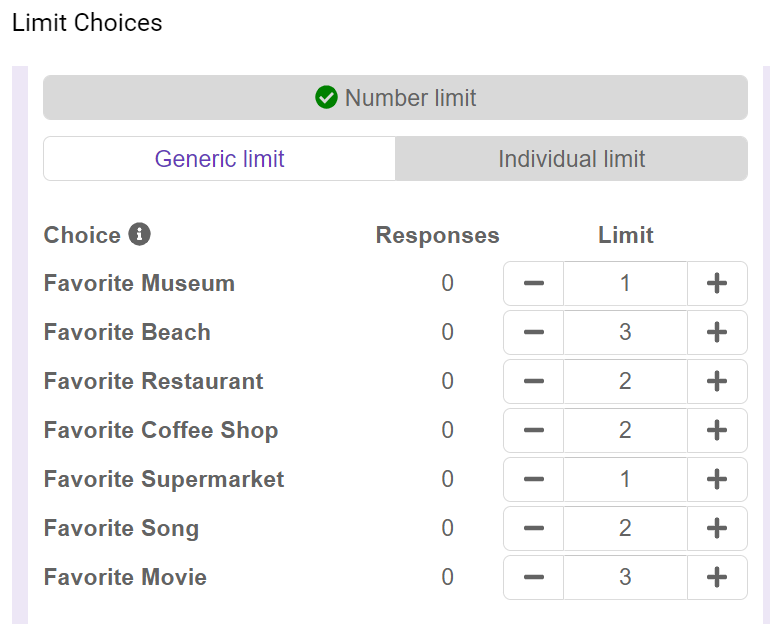
Once the add-on is started for the form you are working on, a window will open where limits can be set for each multiple choice, checkbox, or dropdown question. Generic limits (all the same number) or individual limits (various numbers) are possible. In the screenshot below, notice the different individual limits that are set for presentation topics. Click the minus or plus buttons to change the limits. Then, once the form is shared and the limit is reached for each category, the choice is automatically removed from the form. Scheduling appointments works in the same way. Once the limit is reached, the appointment time is removed so no one else can choose the exact same time.
Need a step-by-step tutorial about this helpful add-on? Check out this 7-minute video from Scott Friesen with Simpletivity Training - How to Limit Multiple Choice Responses in Google Forms.
6. More Training
There are lots of YouTube video tutorials available online. Here are three more recent ones that discuss current features.
- Richard Byrne's 6-minute video, 5 Google Forms Features New Users Overlook, July 2022.
- Busy Miss Beebe's 18-minute video, Google Forms Tutorial Update, Sept. 2022.
- Maddie at EdTech Classroom, 20-minute video for using with Google Classroom, Google Forms Quiz Tutorial – How to Create a Quiz Assignment in Google Classroom, Sept. 2022.
Lastly, consider diving deeper into the basics by viewing OTAN's 3-part Google Forms video training series with presenter Monica Espinoza from Torrance Adult School (Summer 2020 online webinars).
- Part 1: Quizzes (1 hr. 13 min.)
- Part 2: Sharing your Form (1 hr. 17 min.)
- Part 3: Viewing Responses (1 hr. 15 min.)