

Retooling Zoom for a Blended Classroom
by Alisa Takeuchi
Alisa Takeuchi, Garden Grove Adult Education and OTAN SME
posted October 2022
Introduction
Before the pandemic, Zoom was used primarily for businesses. Schools didn’t have a need for virtual classes because students were physically in the classroom. March 2020 changed the ways we teach, we learn, and we manage adult education. Over two and a half years later, although many districts have reopened schools for face-to-face instruction, there is still a need to continue to use Zoom in a blended class. This is for students who cannot or do not want to learn in the classroom as well as for schools that offer instruction for in-class and online at the same time (which might be referred to as blended, hybrid, or HyFlex, depending on the arrangement). The following is a take on what the blended classroom could look like and how Zoom can help with instruction to engage students wherever they are learning.
Keeping Your Zoom Updated
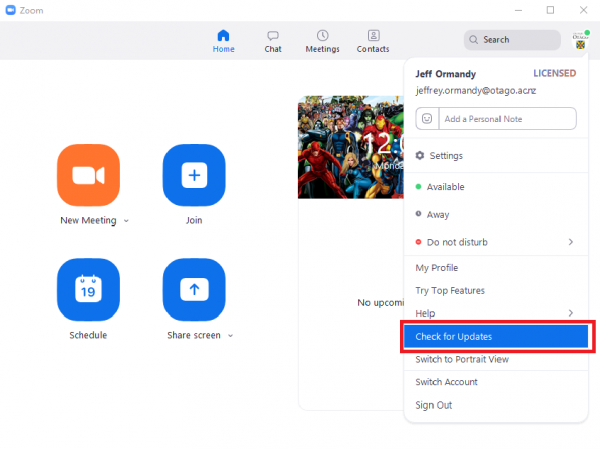
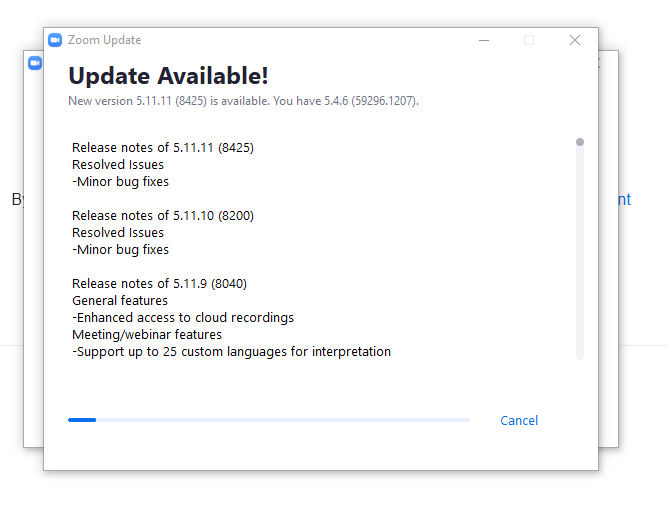
Before we begin with the classroom, there are some basic preparations one must take to ensure smooth transitions between in-class and online instruction. Basic Zoom tools haven’t changed much over the past two years. However, there have been numerous updates, sometimes several within a month. It is a good idea to check your Zoom account regularly for the latest version because some bugs may have been fixed or features may have been added. To do this, follow the steps below:
- Open your Zoom desktop app (if you don’t have the desktop app, go to zoom.us/download)
- Select your profile picture in the upper right corner
- Select Check for Updates near the bottom of the menu
- Select Install if the message indicates Update Available
It is also helpful to teach your students how to update their Zoom accounts as well.
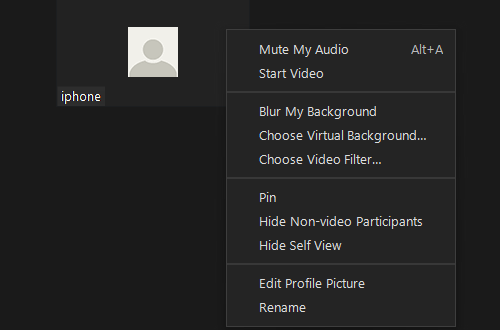
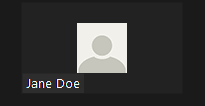
Renaming Participants
Once your class has started, make sure the Zoom students are logged in using their accounts and hopefully displaying their names in the left corner of their thumbnails. If this is not the case, you as the instructor and host of the Zoom session have the power to manually rename any participant. To do this follow the steps below:
- Select the three dots on the thumbnail of the participant you want to rename
- Select Rename
- Type the name in the text box
This is helpful, not only for you, but for the other students in the class as well. Conversations can be easier when students know each other’s names. Participants can also rename themselves if this setting is turned on in your Zoom account.
Using the Toolbars Effectively
Zoom has many wonderful tools which can be useful yet overwhelming. Depending on which functions you are using, there are different toolbars to navigate.
Basic toolbar: This is the primary toolbar. Most of the actions associated with Zoom are done here.

Reaction Toolbar: This is a great resource for non-verbal interactions and feedback. Students can demonstrate their understanding or lack thereof as a quick reference for the teacher. You can also teach students to react when an in-class student contributes or shares something with positive emojis. This can really bring a sense of community and trust within the classroom.
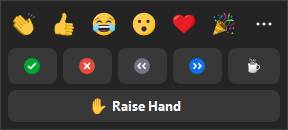
Share Screen Toolbar: Although students can eventually be taught how to share their screen, in the beginning, the Share Screen feature is primarily for the instructor. There are many different options for one to use while sharing a presentation, a website, a worksheet, etc. At first glance, it looks like the basic tool bar, but once you initially share, the Share Screen button changes to New Share, which is a newer feature you can use instead of Stop Share and Share Screen again to change what you would like to share.
Another newer feature is Pause Share. This is a great option for multitasking without having to Stop Share. If you would like your Zoom participants to continue looking at the shared screen, but you need to go to a different tab, activity, etc., you select Pause Share. Once selected, the image freezes while you navigate to other webpages or files. When you are finished, select Resume Share and the screen will unfreeze to continue interacting with what you are sharing.

Annotation Toolbar: This is another great way to get your students engaged and become active learners. With this toolbar, students can type, write, draw, stamp, and erase answers or thoughts on the screen for others to see. It’s also easy to use for annotating classroom reading texts.

Participant Views for Engagement
There are many engaging ways to organize participants on a Zoom screen. There are multiple options to select how the participants will be viewed either by you or in-class students. For some activities, you may want all the Zoom students to be visible on the screen so the in-class students can see them. Other times, you may want the Zoom students not visible on the screen to maximize the view of materials being shared. Similar to an in-person classroom, participant views and participation will be dependent on how the lesson is designed.
Gallery: This view allows all or most participants to be shown at one time. This view can also be altered quickly by resizing the window. Hover over a corner of the Zoom window and an arrow will appear which allows you to make the window larger or smaller.

Speaker: This view will primarily display the person speaking. This is a good view for optimizing student focus on the speaker. However, this can be distracting if other participants have background noise, so ensure Mute All at the bottom of the Participants window is employed before using the Speaker view. Zoom cannot differentiate, so the view will go back and forth between sounds. Having students Mute will help with this, but they must remember to Unmute to speak. As a host, the opportunity exists to mute and unmute participants as you wish.
Panel: This view is ideal if you don’t have many participants in Zoom and you want to display them on the main screen. Because they are in a straight line either horizontally or vertically, the panel doesn’t take up much real estate to display when sharing.

Thumbnail: This view allows one participant to be viewed in a very small space. You can move the thumbnail easily if it is covering any part of the screen you wish students to see. However, it is easy to “lose” the thumbnail if you have other applications or documents on top of it.
Where to Start With Your Students
It’s hard to plan exactly how your students will engage with each other in class because each class is so different. The number of students in the classroom (sometimes known as “Roomies”) and on Zoom (sometimes known as “Zoomies”), the digital skills of the Zoom students, and the English language level of non-native speakers all contribute to the pace of the class both academically and socially. Giving clear expectations for all students from the beginning is ideal. As the semester continues, enlisting a student or two who attend class regularly to assist new students will be helpful. Creating “How To” guides both as documents and videos can also save a lot of time and frustration. If your school gives orientations, having one specifically for online learning will alleviate most troubleshooting that may need to happen while the student is at home.
Formative Assessments
Utilize the Chat
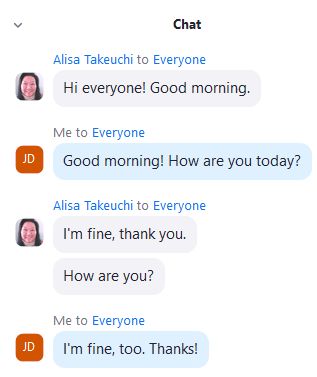
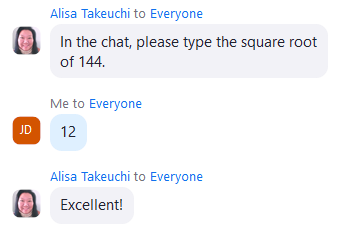
The Chat feature on Zoom is a powerful tool to engage students as well as quickly assess the Zoom students on listening, writing, typing, and comprehension, sometimes all at the same time. For example, if you are teaching Beginning ESL, you could ask the students to type their last name in the chat. As students type their answers, you can quickly assess which students understood what you asked, typed the correct answer, and used capital letters appropriately. For those who didn’t, they can quickly modify their answers all in a matter of seconds. In addition, the Chat feature allows students to demonstrate their understanding of the content. In-class students can ask the Zoom students to type an answer in the chat to a question or dictation. One Zoom student can type the present tense of a verb and one in class student can say the past tense.
As students become more familiar with typing each day, they will become faster. If they are on a computer, their keyboarding skills will advance and if they are on their phones or tablets, their letter recognition will also advance.
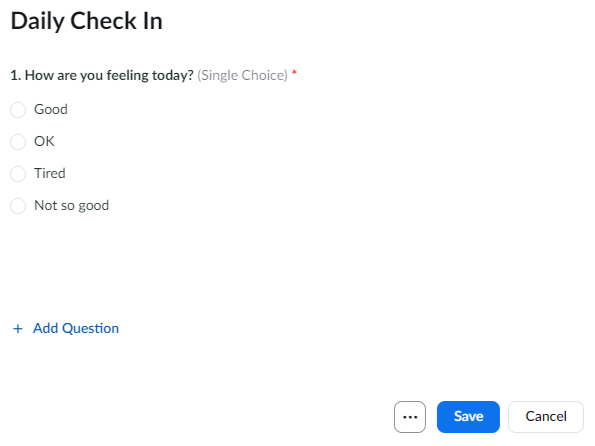
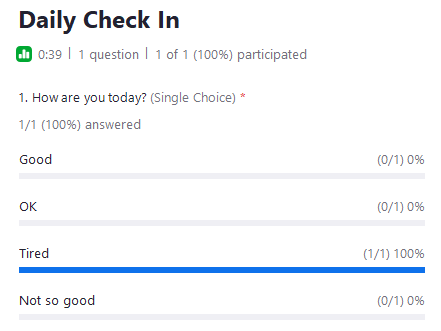
Polls
Polls have become extremely valuable for online learning. Just like Chat, instructors can quickly assess students with comprehension questions for a quick feel for the room on student understanding. Polls can also be used to check in with students on an emotional level, giving students an opportunity to voice the need to slow down, repeat the lesson, or even take a break. Answers to polls can be given anonymously, which is important to make sure the students understand this so they feel they can answer honestly. Polls can be created ahead of time and added to a Zoom session, or if you are able to navigate digitally on the fly, you can create polls during a Zoom session.
Annotation Tools
As stated above, the annotation toolbar can be a great resource to give your students a choice on how they would like to express themselves. Some may want to type the answer on a document, some may want to draw a picture to demonstrate understanding, and some may want to use the stamp feature to indicate their answer. Allowing students to have a choice engages them, advances their digital skills, and reinforces the understanding of content.
Experience From the Field
Engaging All Students
Teaching with a blended, hybrid, or HyFlex model of instruction can be challenging and engaging all students at the same time may seem even impossible. However, there are ways to grab students' attention whether they are in the classroom or online. There are so many varieties of activities that will allow the in-class and Zoom students to work and help each other. For example:
- Having conversations with each other will build rapport and a community among the students. Zoom students could feel isolated at home but will feel connected when the in-class students engage with them.
- Giving opportunities for the Zoom students to contribute to answering questions on worksheets using the Annotation tools is another way to give equal time for all students to check their work as a class.
- By using the Zoom students’ homes as a classroom, students can look for and show a multitude of vocabulary words that the in-class students cannot. For example, if the vocabulary word is broom, a Zoom student can go and find the broom in their home and show the rest of the class. They can even demonstrate how it works! Allowing the students to study from home and providing them with special tasks that only they may be able to do will make them feel they are an important part of the class.
Teaching online is a new concept for many and thinking outside of the box will help the students as well as yourself grow.
Using a tool primarily created for business meetings has revolutionized education. Many schools and programs would not have been able to continue classes easily during the sudden shutdown created by the pandemic. Teachers have adapted and created lessons solely for the purpose of virtual or online learning. Now as schools open their classrooms to students, managing instruction for both in-class students and virtual students to engage and interact with one another seamlessly no matter the location of learning can be done.
Resources
Adjusting Your Video Layout During a Virtual Meeting – Zoom Support
Five Tips for Hybrid/HyFlex Teaching with All Learners in Mind